Microsoft Entra ID SSO for Portainer
Microsoft Entra ID SSO for Portainer
Prerequisites:This Abilityguide shows how to integrate Portainer with Microsoft Entra ID using the built-in Microsoft OAuth provider.
Important licensing note
SSO features depend on the Portainer edition and licensing model available for your deployment. Validate your current Portainer edition and entitlement before starting.
Why integrate Portainer with Entra ID
Benefits:
Prerequisites
This guide will take you through the various stages of installing SSO using
Step not1: possibleCreate the app registration
Recommended settings:
https://<portainer-domain>:9443
Record the Tenant ID, Application ID and Client Secret.
Step 2: Configure permissions
Use standard delegated sign-in permissions:
openid
profile
email
If you plan to adduse thegroup-based SSOteam functionsmembership, also configure group claims in the token.
Step 3: Configure Portainer Communityauthentication
In (CE).Portainer Accordingly, we havego to purchaseSettings a> freeAuthentication license> ofOAuth the> Business Edition (BE)Microsoft and upgradeconfigure:
alsoWarning
supportedDobynotPortainer.hide the internal authentication prompt until the external login is fully tested.
Create
Step Registration4: Optional team mapping
First,If anyou appwant registrationautomated includingauthorization:
Summary
Portainer is available. These URIs will be used forand Microsoft Entra ID towork knowwell wheretogether towhen redirectyou thecombine usera inclean caseweb ofapp successfulregistration, logins.
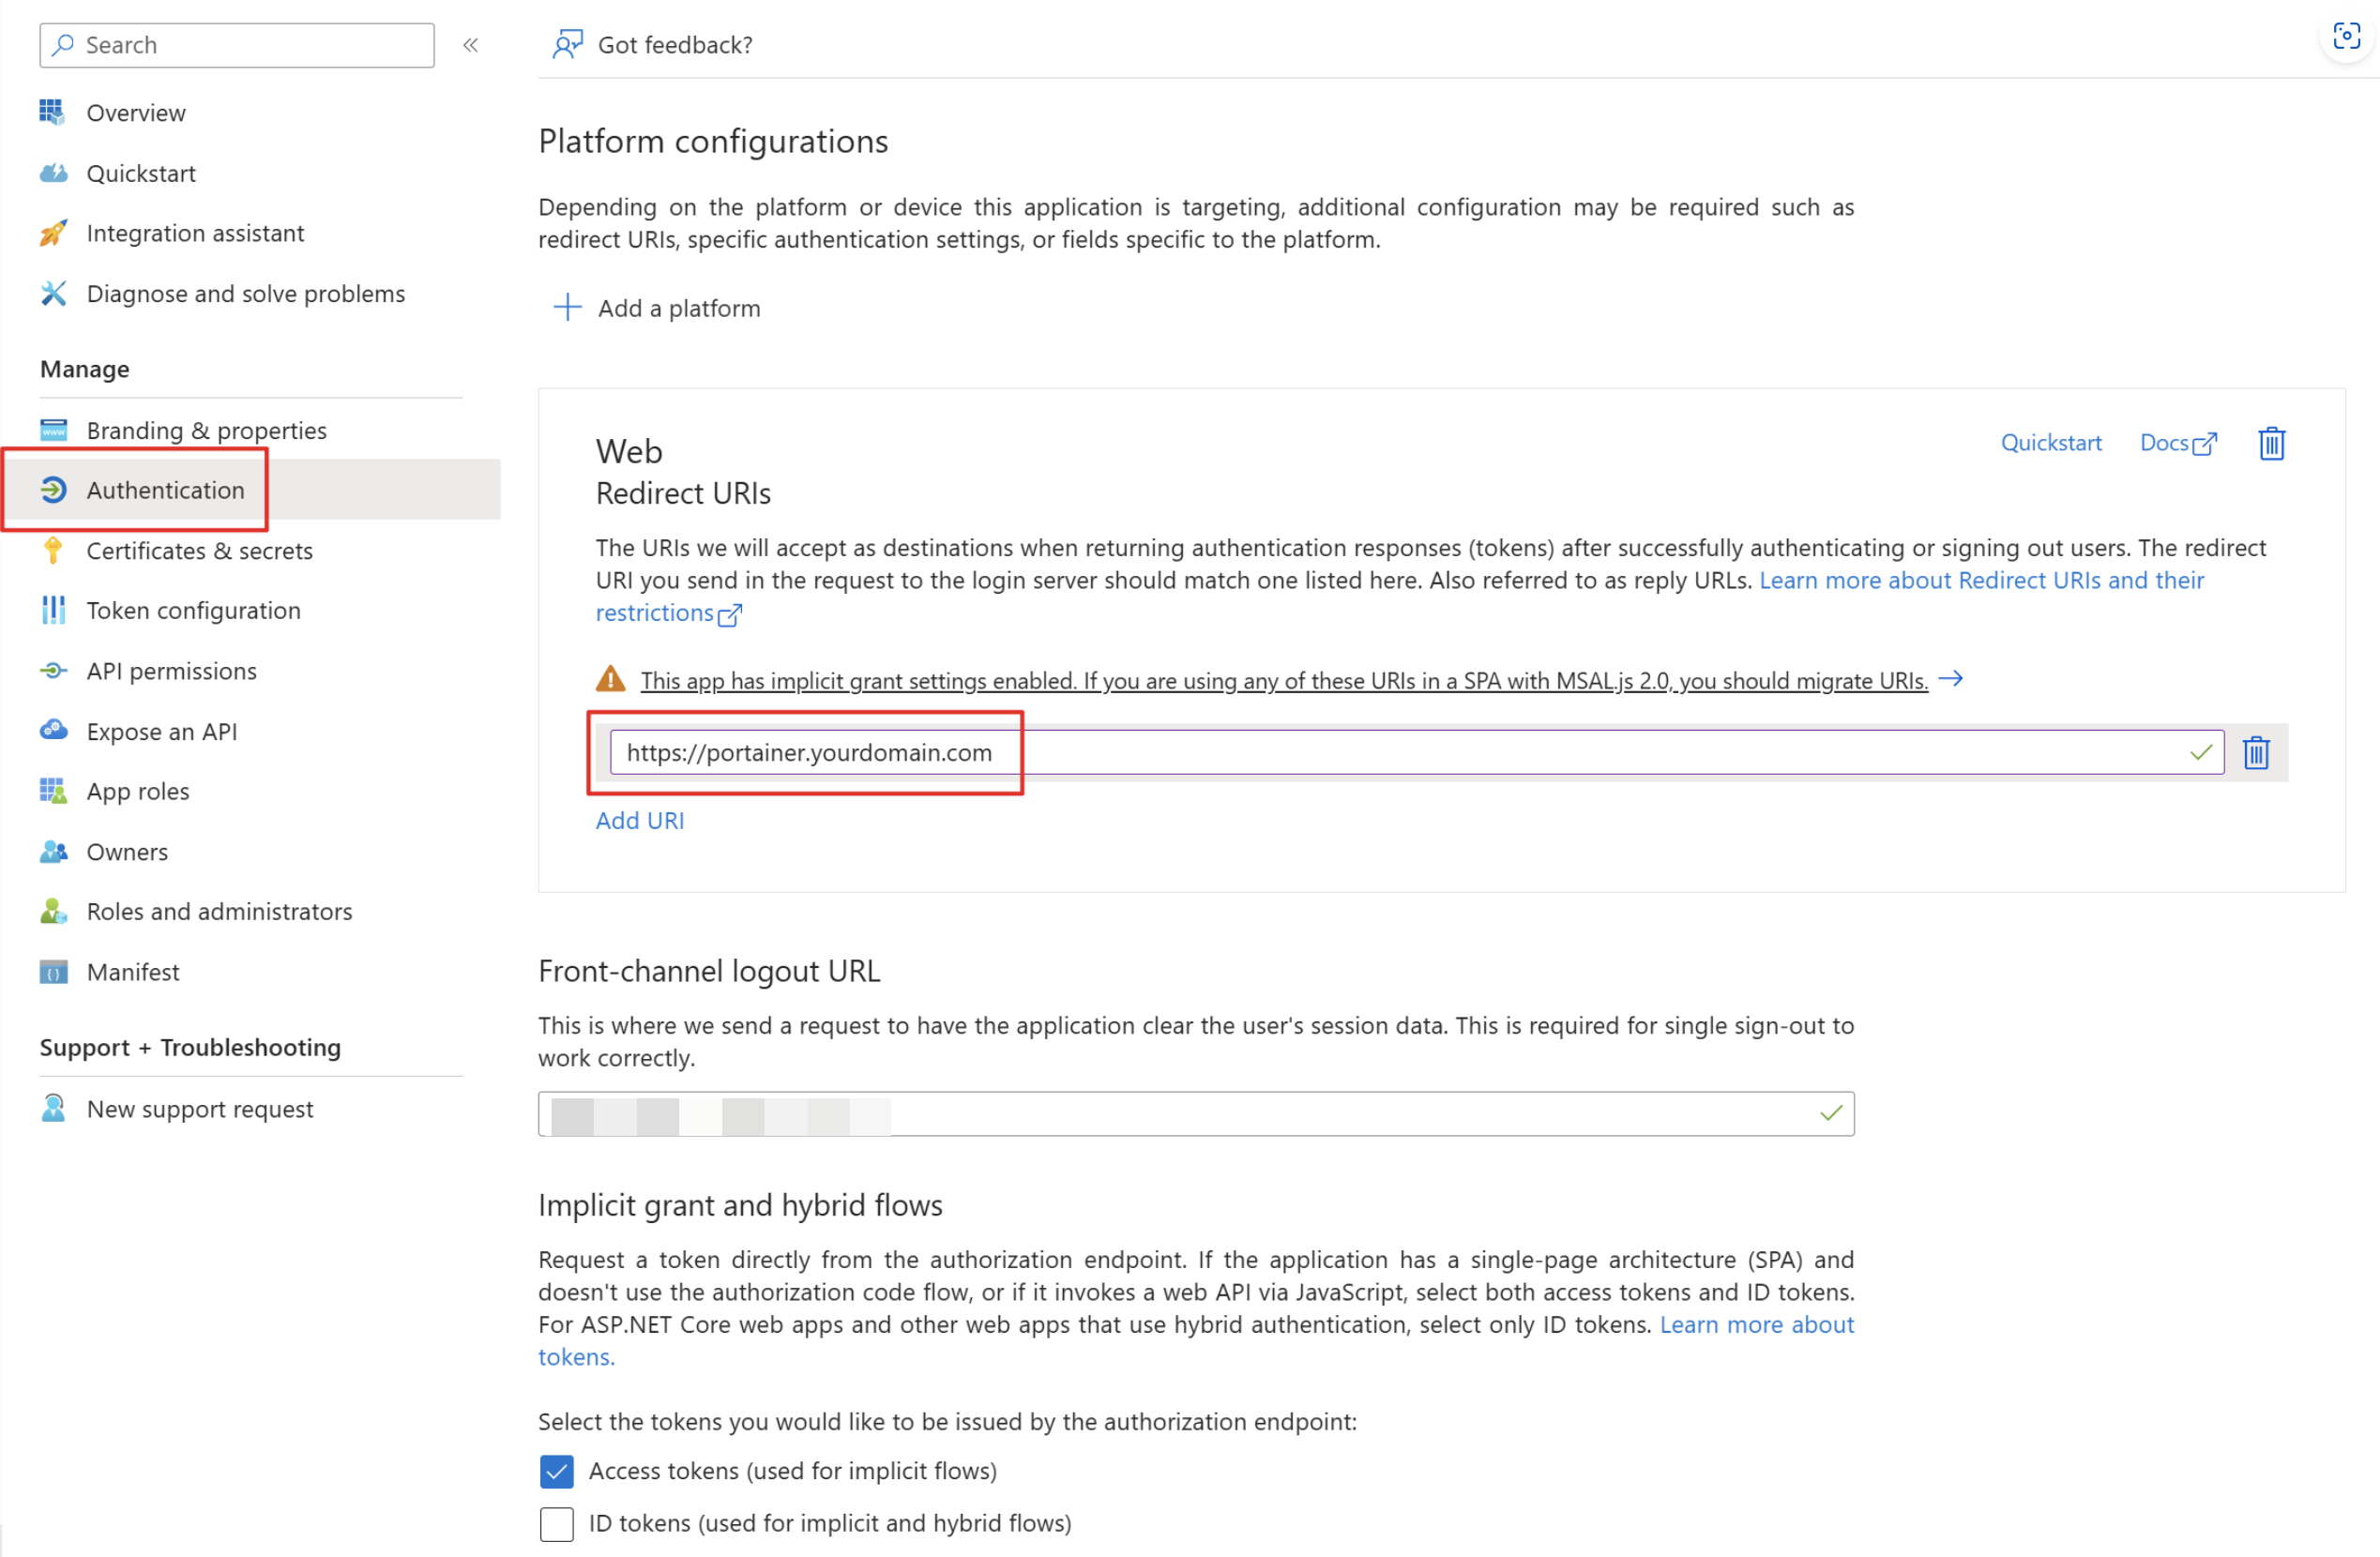
Add the corresponding permissions for OpenID Connect asstandard delegated permissionsOIDC permissions, optional group claims and grantcareful adminfallback consentaccess for your tenant.planning.
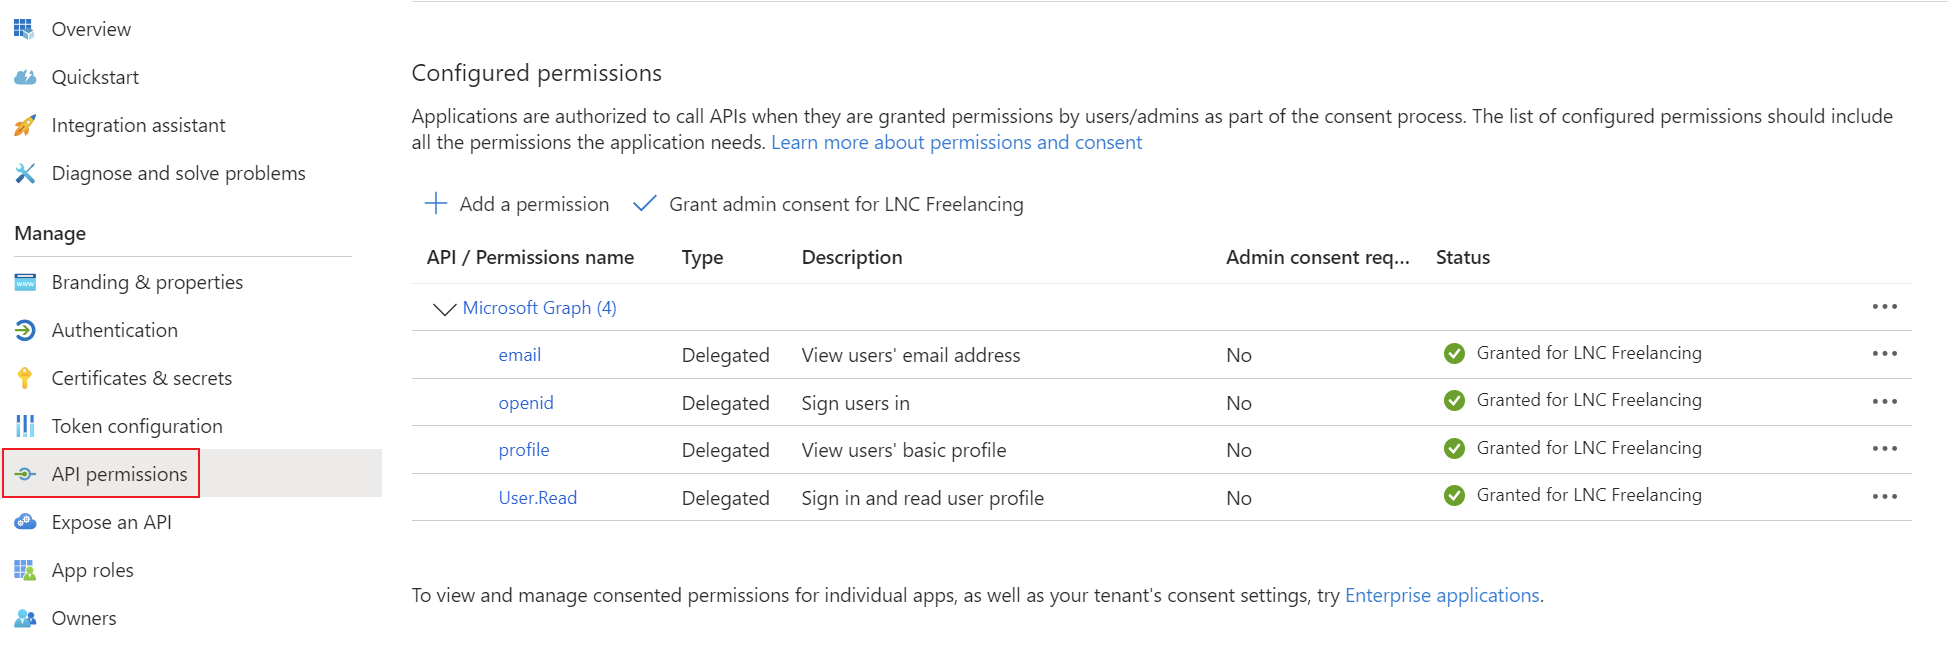
Create a client secret for the application and save the tenant ID, application ID and client secret in your password manager. You can find instructions for this information here: Get app details and grant permissions to app registration
Acquire Portainer License
To activate the SSO functionality, the Portainer Comunity Edition must be replaced by a Business Edition. Don't worry, it costs nothing. At least for a Homelab environment and installation with less than 3 environments. For business customer licensing in Portainer Business Edition is based on the number of nodes you are managing.
Create an account and follow the instructions on this page: Take 3 - Get your first 3 nodes free (portainer.io)
Upgrade Portainer instance
After you have received the license key via email you can start upgrading your Portainer CE to a Portainer BE instance. Make sure to create a backup before you upgrade the instance.
When running portainer inside a single docker container, it is no simpler than changing the image from "portainer/portainer-ce" to "portainer/portainer-ee" and restart the stack or containers. You can find more in depth guides and version specific upgrade manuals here: Docker Standalone | Portainer Documentation
Check activation status
After installing the license, this can be checked in the web interface. To do this, navigate to “Licenses” and check whether your license is installed and the limitation to 3 nodes is displayed. Then you are ready to add external authentication providers such as Microsoft Entra ID. Go to the next step.
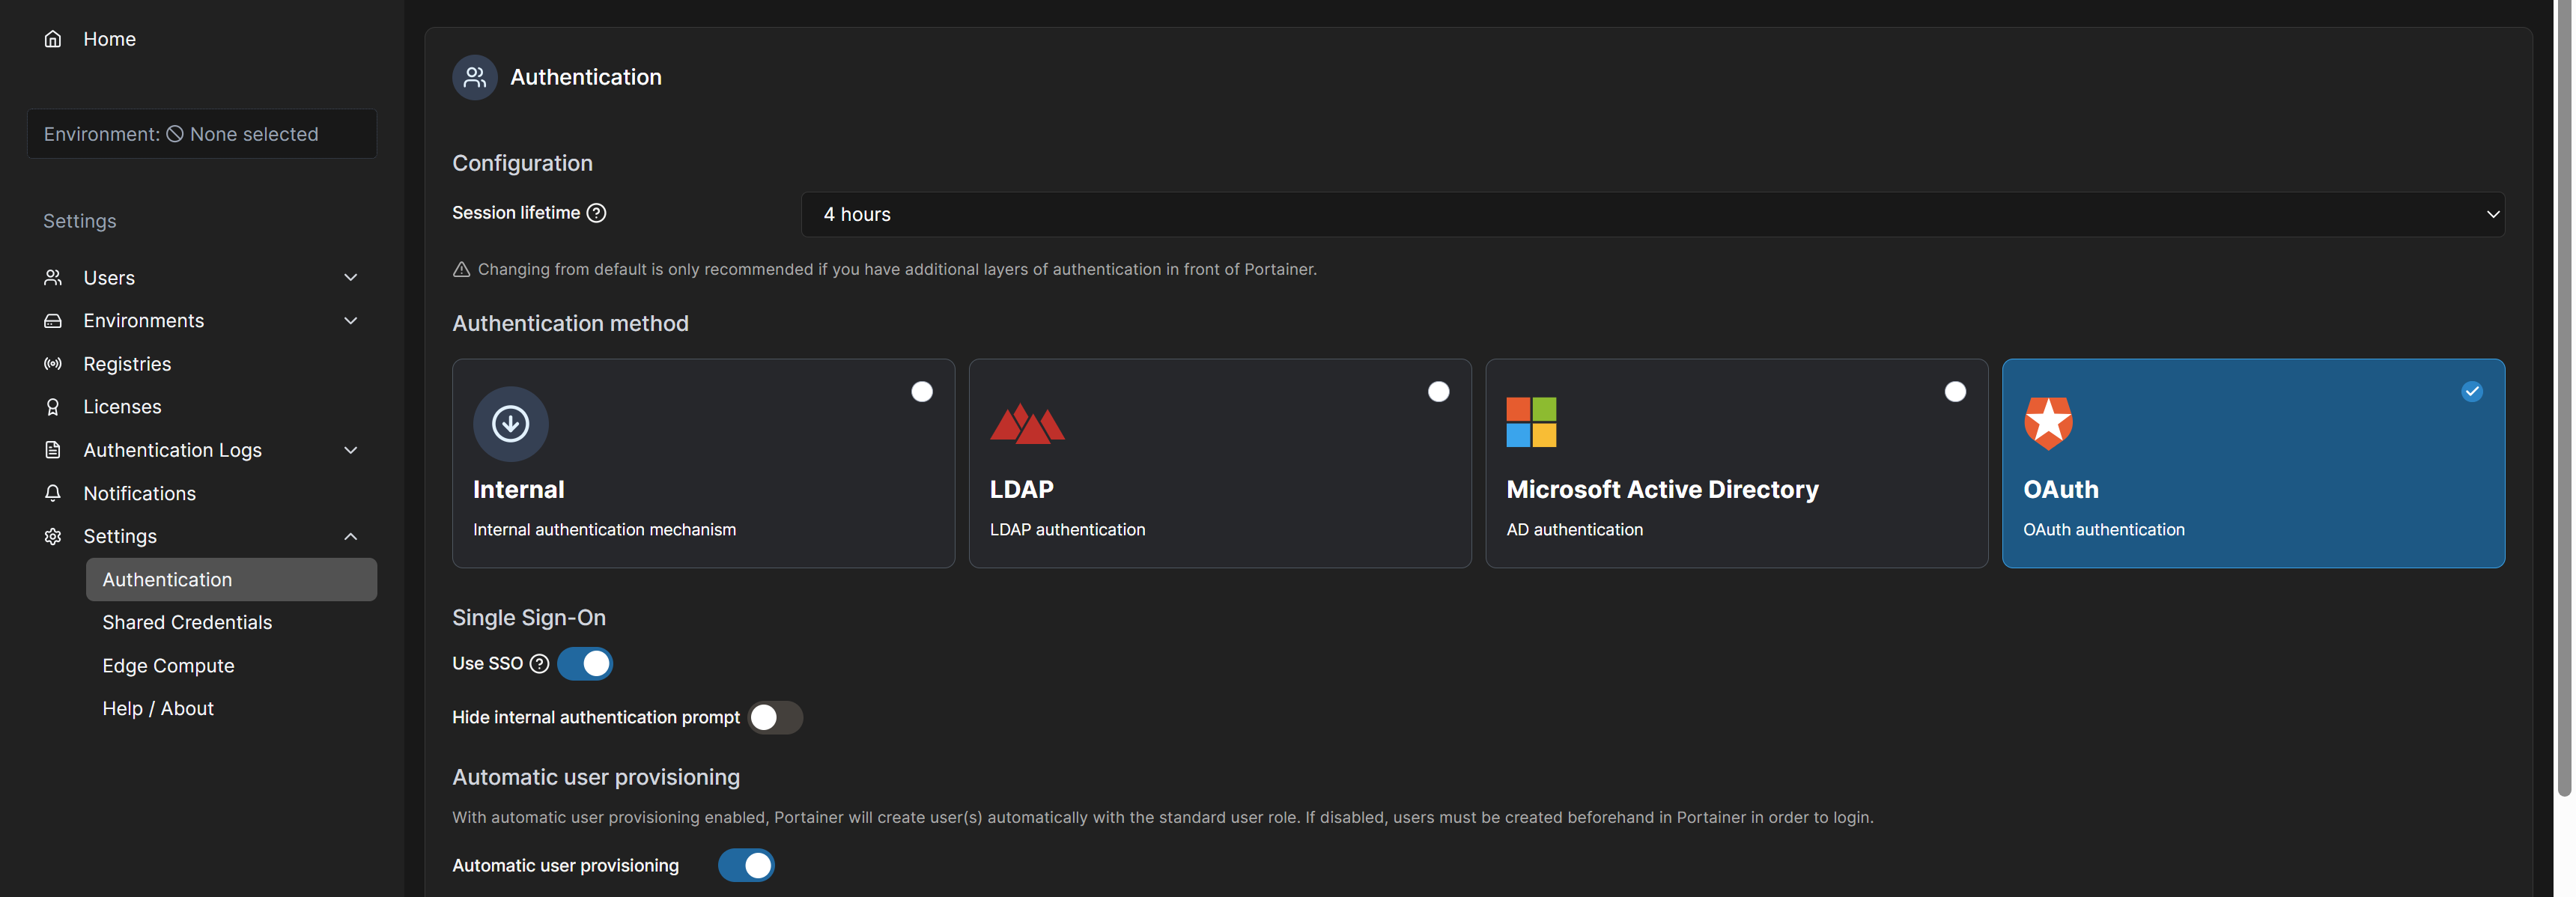
Setup Microsoft Entra ID login provider
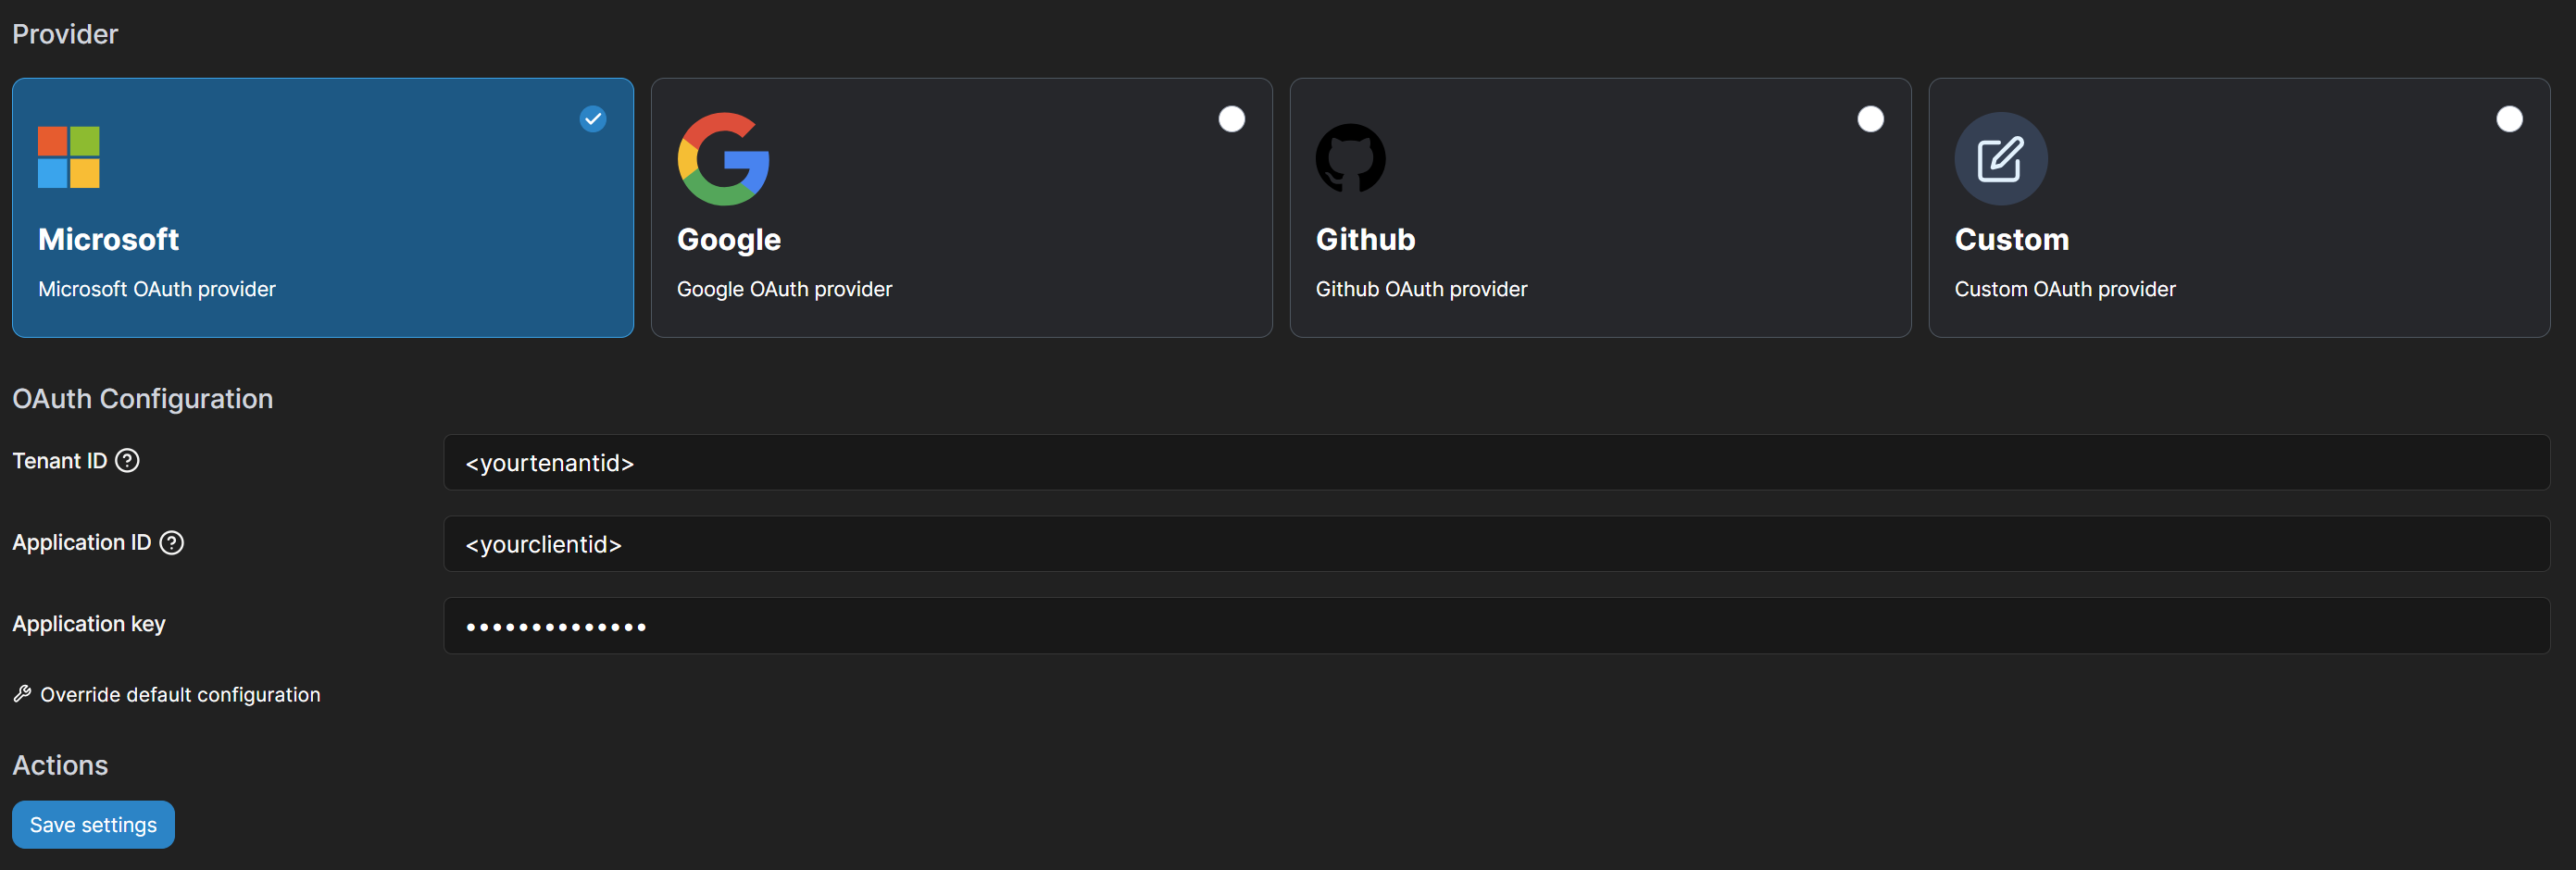
For the setup, log into the web interface with an administrator account. You can then select the “OAuth” option under Settings -> Authentication -> Authentication method. The following settings enable automatic user provision or a default group. Configure this as it suits you. Attention: It is recommended that the option “hide internal authentication prompt” is not activated so that the values can still be adjusted in the event of a misconfiguration of the OAuth provider settings. If this is activated, you can lock yourself out and have to rebuild the Portainer instance.
You can then select the "Microsoft OAuth provider" under “Provider” and fill in the TenantID, ClientID and Client Secret options with the corresponding values from the app registration. After saving the settings, you can control who can connect to the web interface of the Portainer instance via the app registration members.