Get app details and grant permissions to app registration
Provision App Registration
App Registrations are containers that allow user-independent permission assignment and are therefore ideally suited for automation. App Registrations can be created in Azure Portal → Microsoft Entra ID → App Registrations. App Registrations should be preferred to service accounts whenever possible.
The following variables are used to authenticate to the Graph API using application permissions. The ClientSecret must not be stored as clear text in scripts or applications under any circumstances, but must be stored in designated containers (e.g. Azure Runbook Credential Store, Azure Key Vault or Windows Credential Store).
Variables used
$TenantID: This is the identity of the tenant, which is unique.
$ClientID: The ClientID can be used to uniquely identify the App Registration.
$ClientSecret: The ClientSecret expires every max. 24 months (2 years) and is like the password for the App Registration.
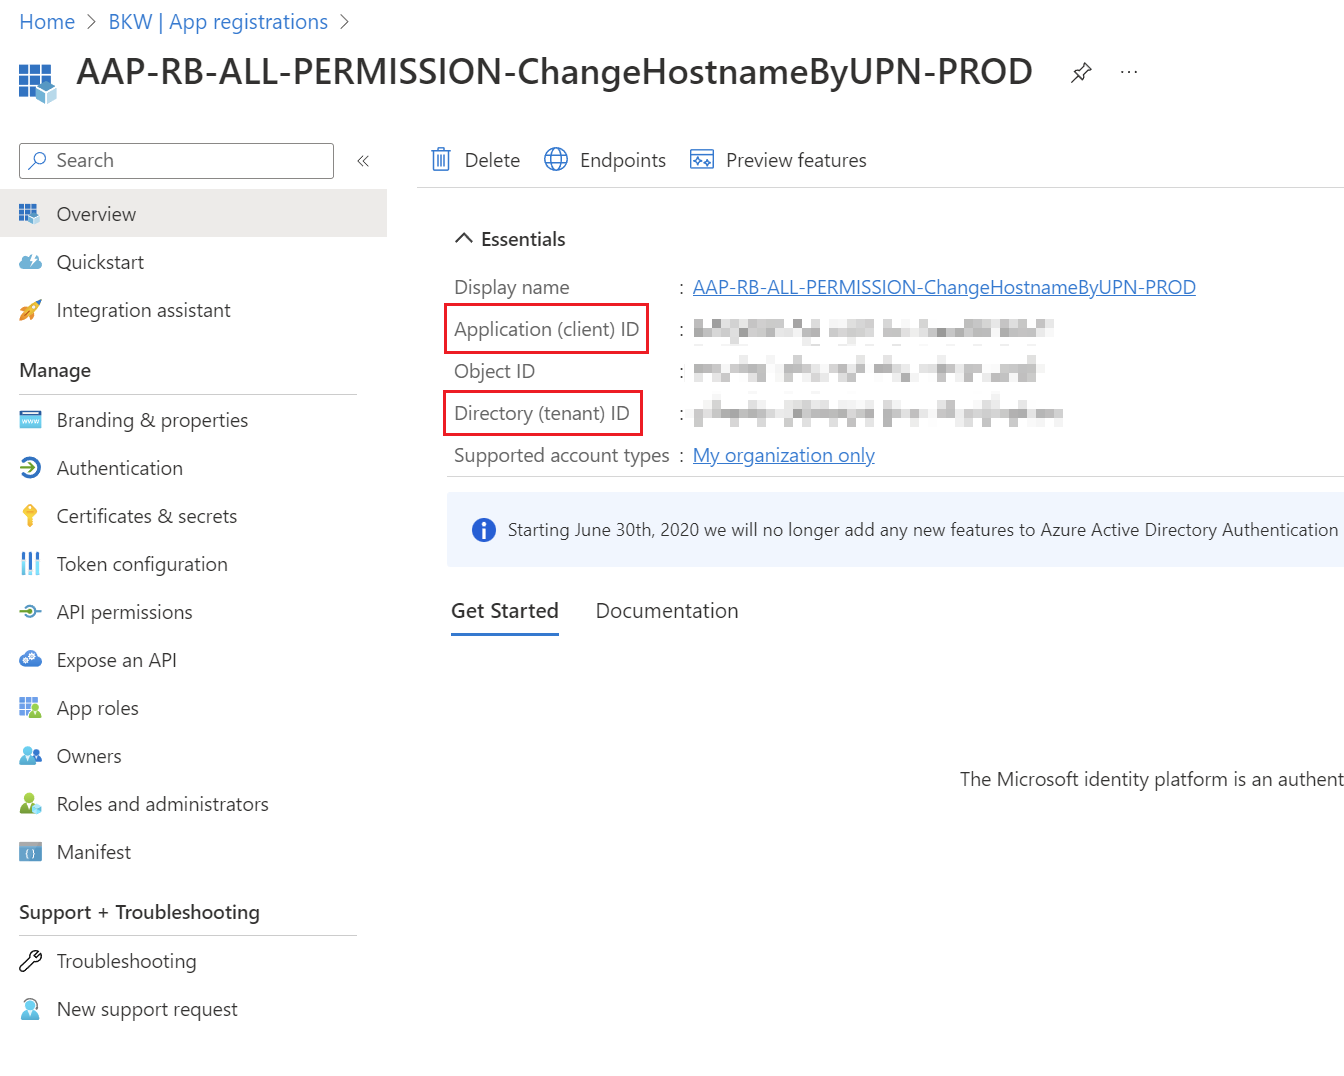
Read ClientID & TenantID
The ClientID & TenantID can be read out on the start page of the App Registration itself.
Create client secret
For the ClientSecret you have to switch to the "Certificates & Secrets" tab. A ClientSecret can be added via "New client secret". Then a name can be given there. Attention: Afterwards the ClientSecret is valid for 24 months (2 years) and expires after a certain time. In addition, the value is only displayed once. Save the ClientSecret as the first step in your password storage solution and note the expirationdate.

Grant permissions
As soon as the authentication via the app registration with the three values works, the permissions have to be assigned. This is a very tricky step, as an app could practically become a global administrator and overwrite or delete any tenant configurations.
The permissions on App Registrations for PowerShell Scripts must always be set to Application-Permissions, because the actions should be executed as App-Context.
Find the required permissions
The best way to find the required permissions is to visit the Microsoft Docs page for Graph API: Microsoft Graph REST API v1.0 endpoint reference - Microsoft Graph v1.0 | Microsoft Learn

Assign permissions
Once it has been determined which permissions need to be assigned, this can be done in Azure Portal → Microsoft Entra ID → App Registration → API permissions.
First, "Add a permission" must be selected and then Microsoft Graph as an API resource.
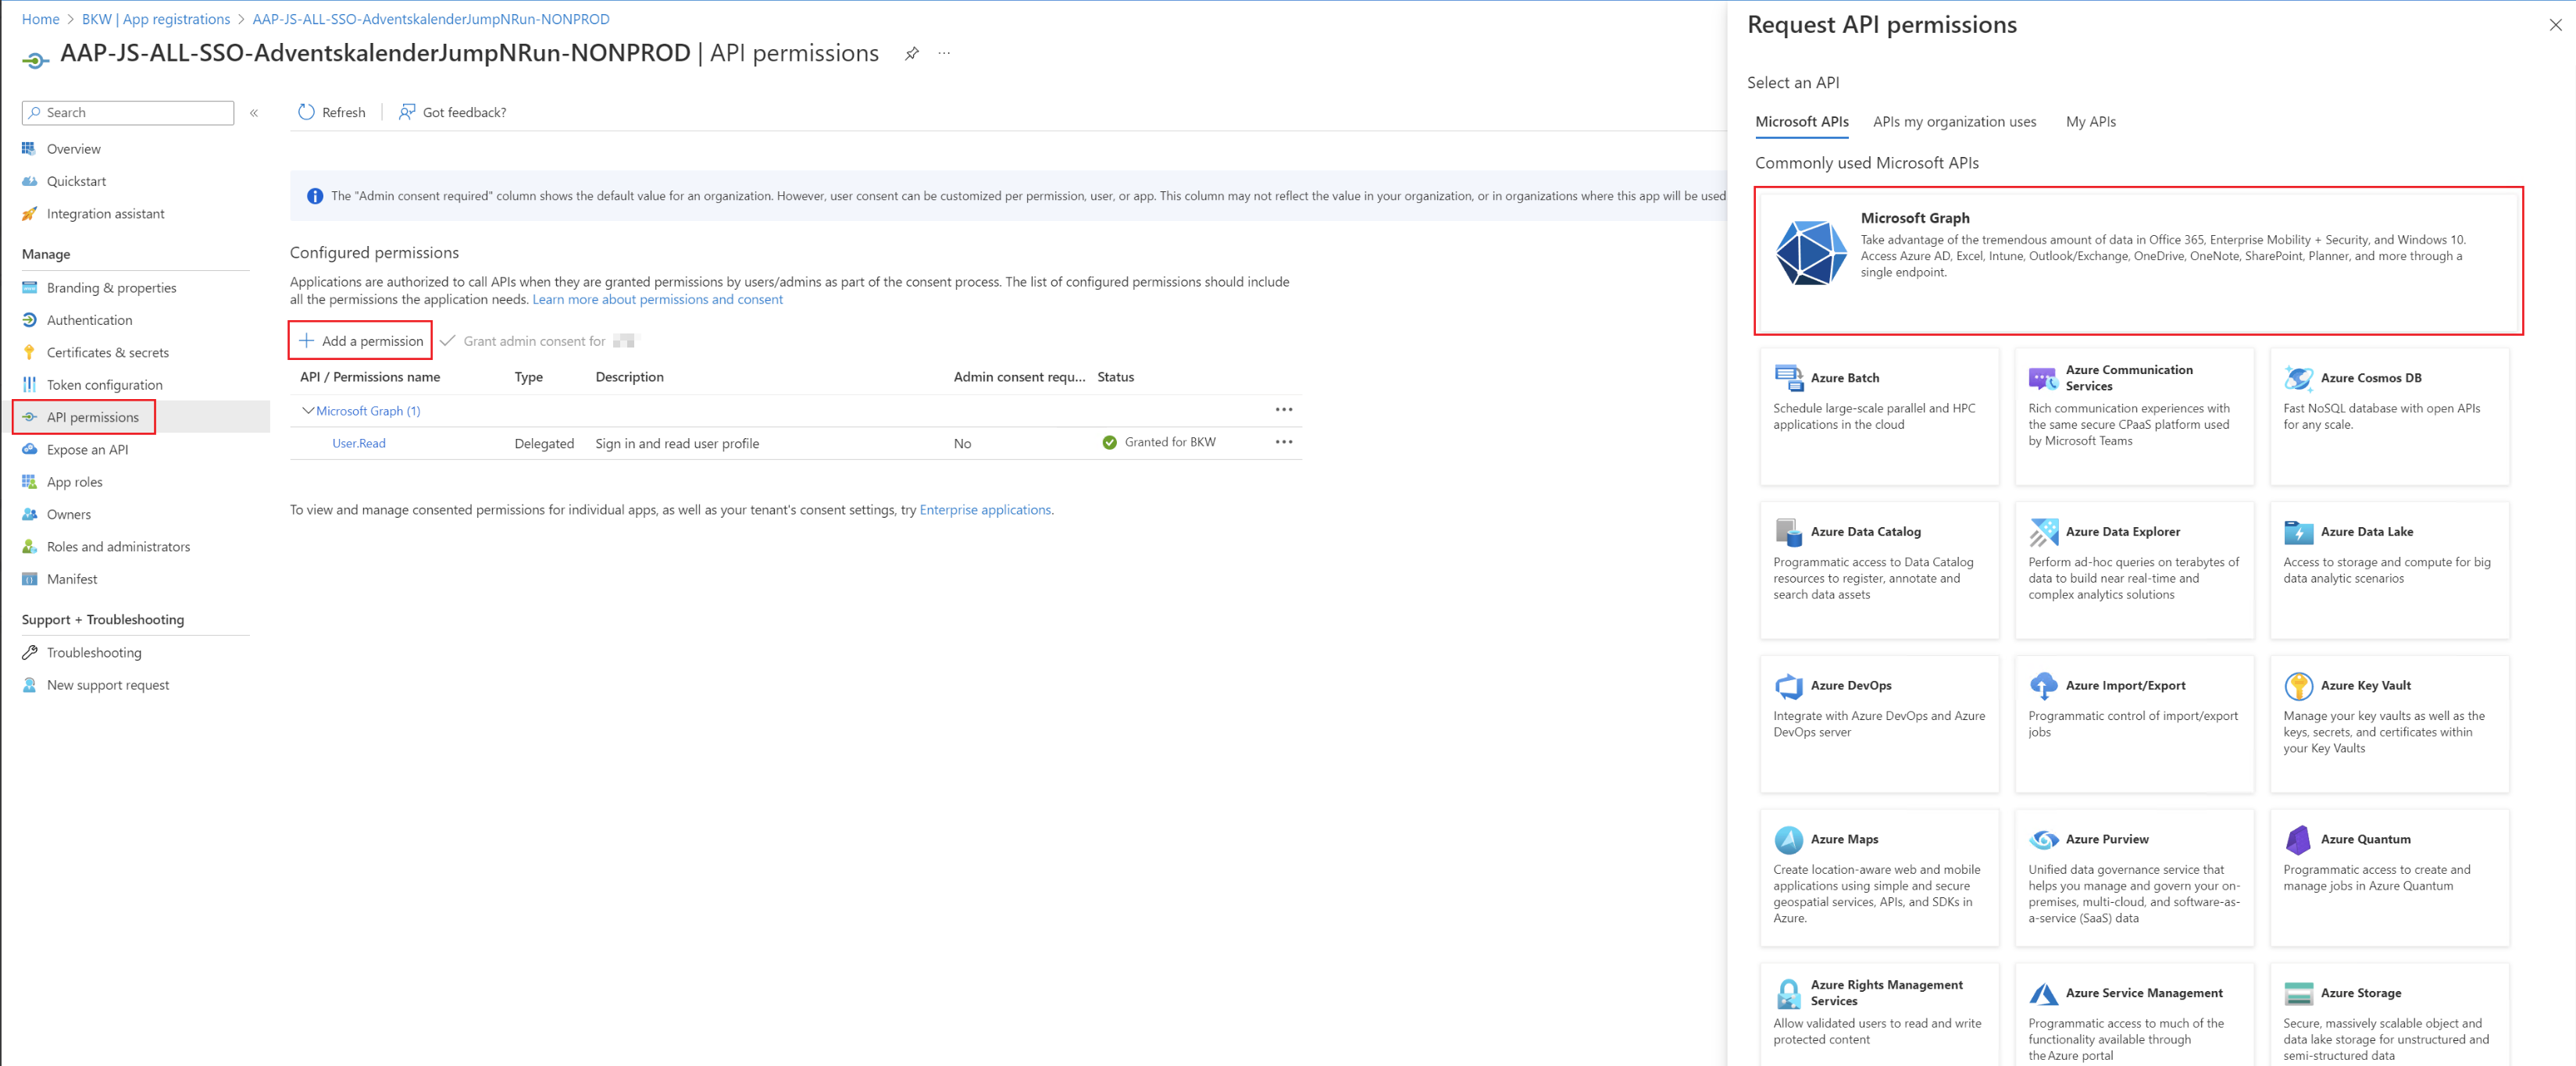
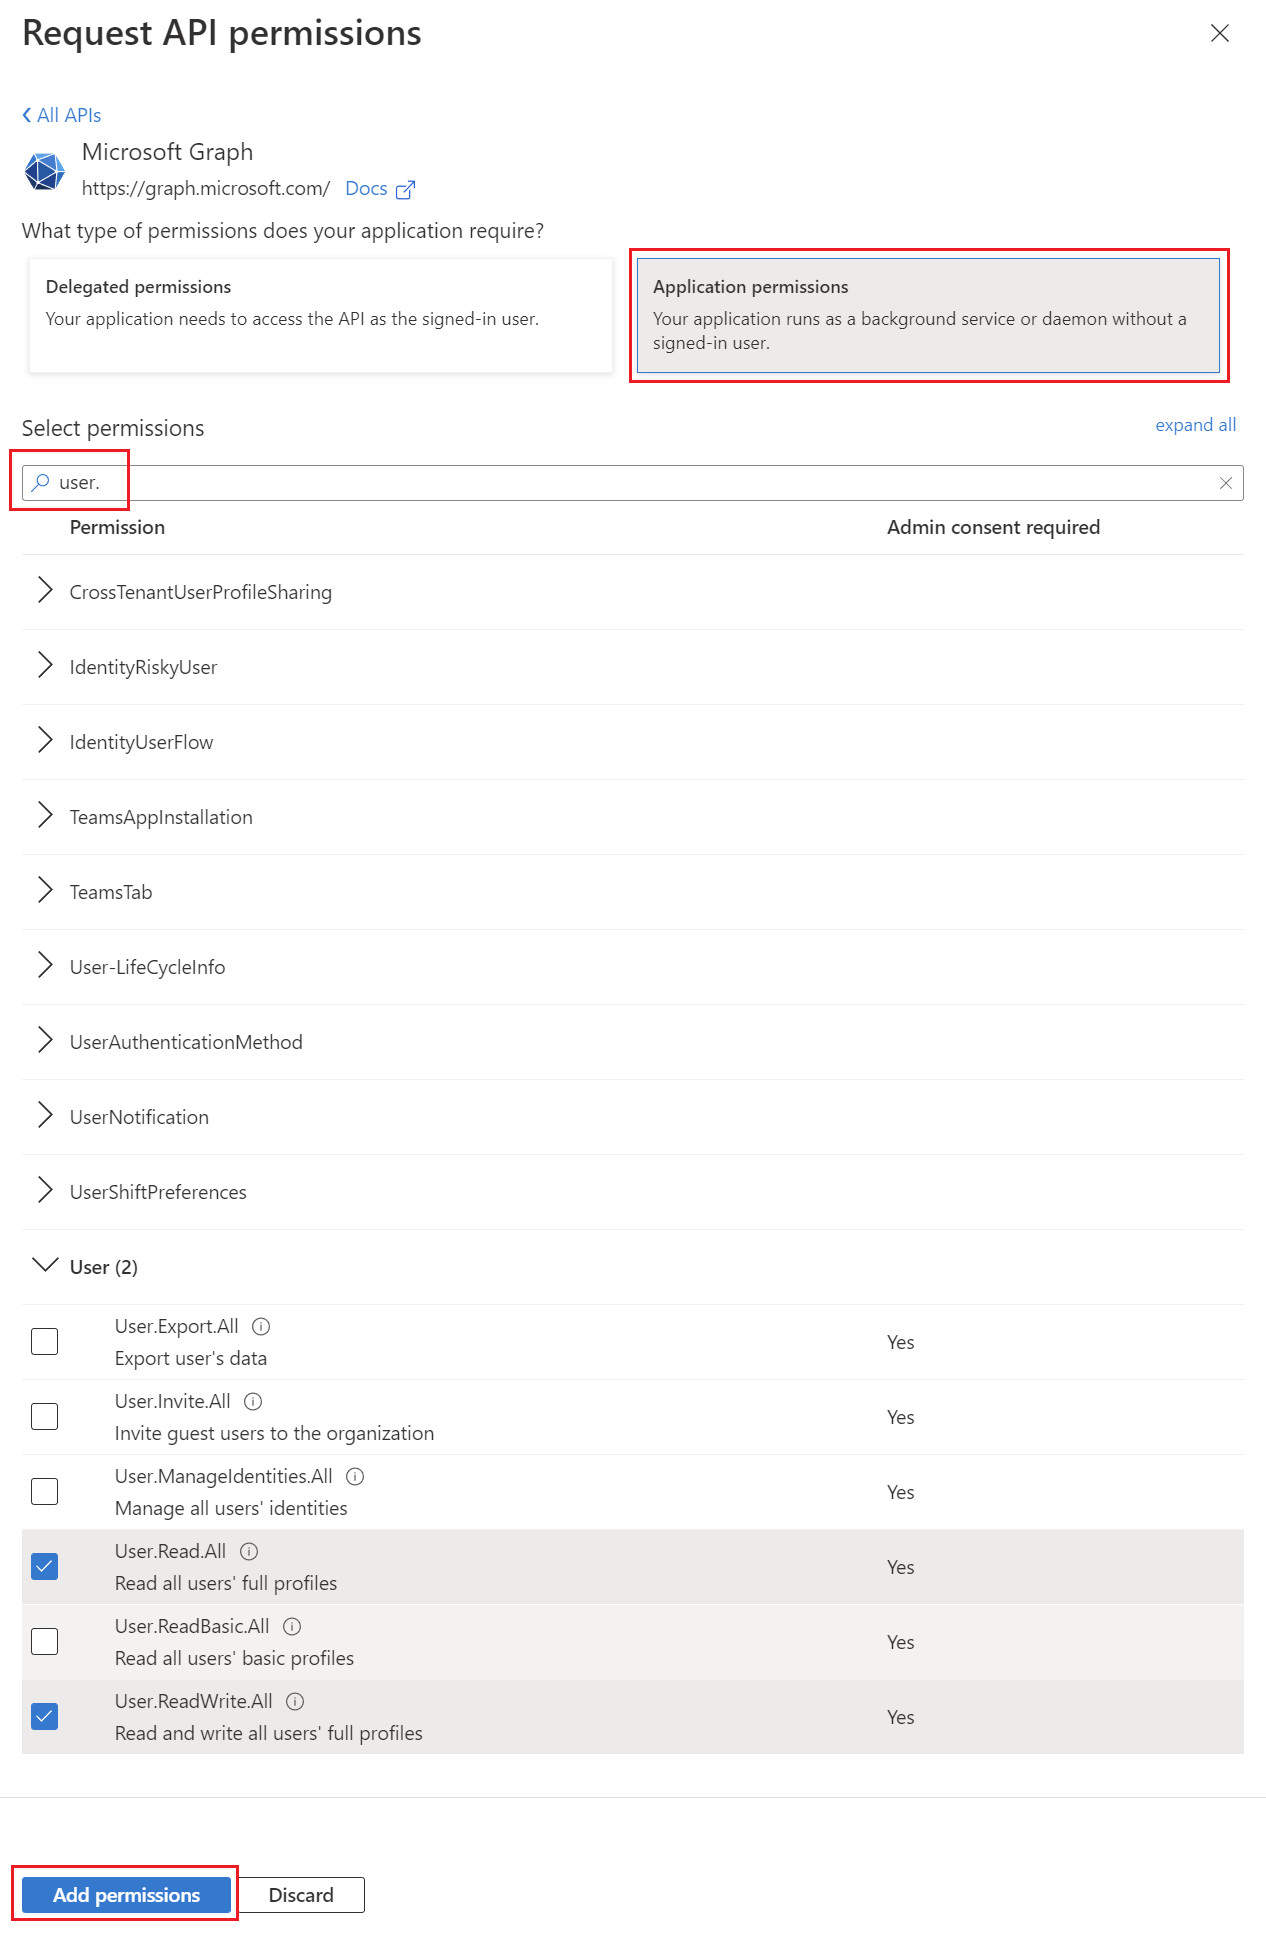
Then it is important that "Application permissions" is selected. There you can then search for the corresponding permission from the Microsoft Docs page and add it using "Add permissions".
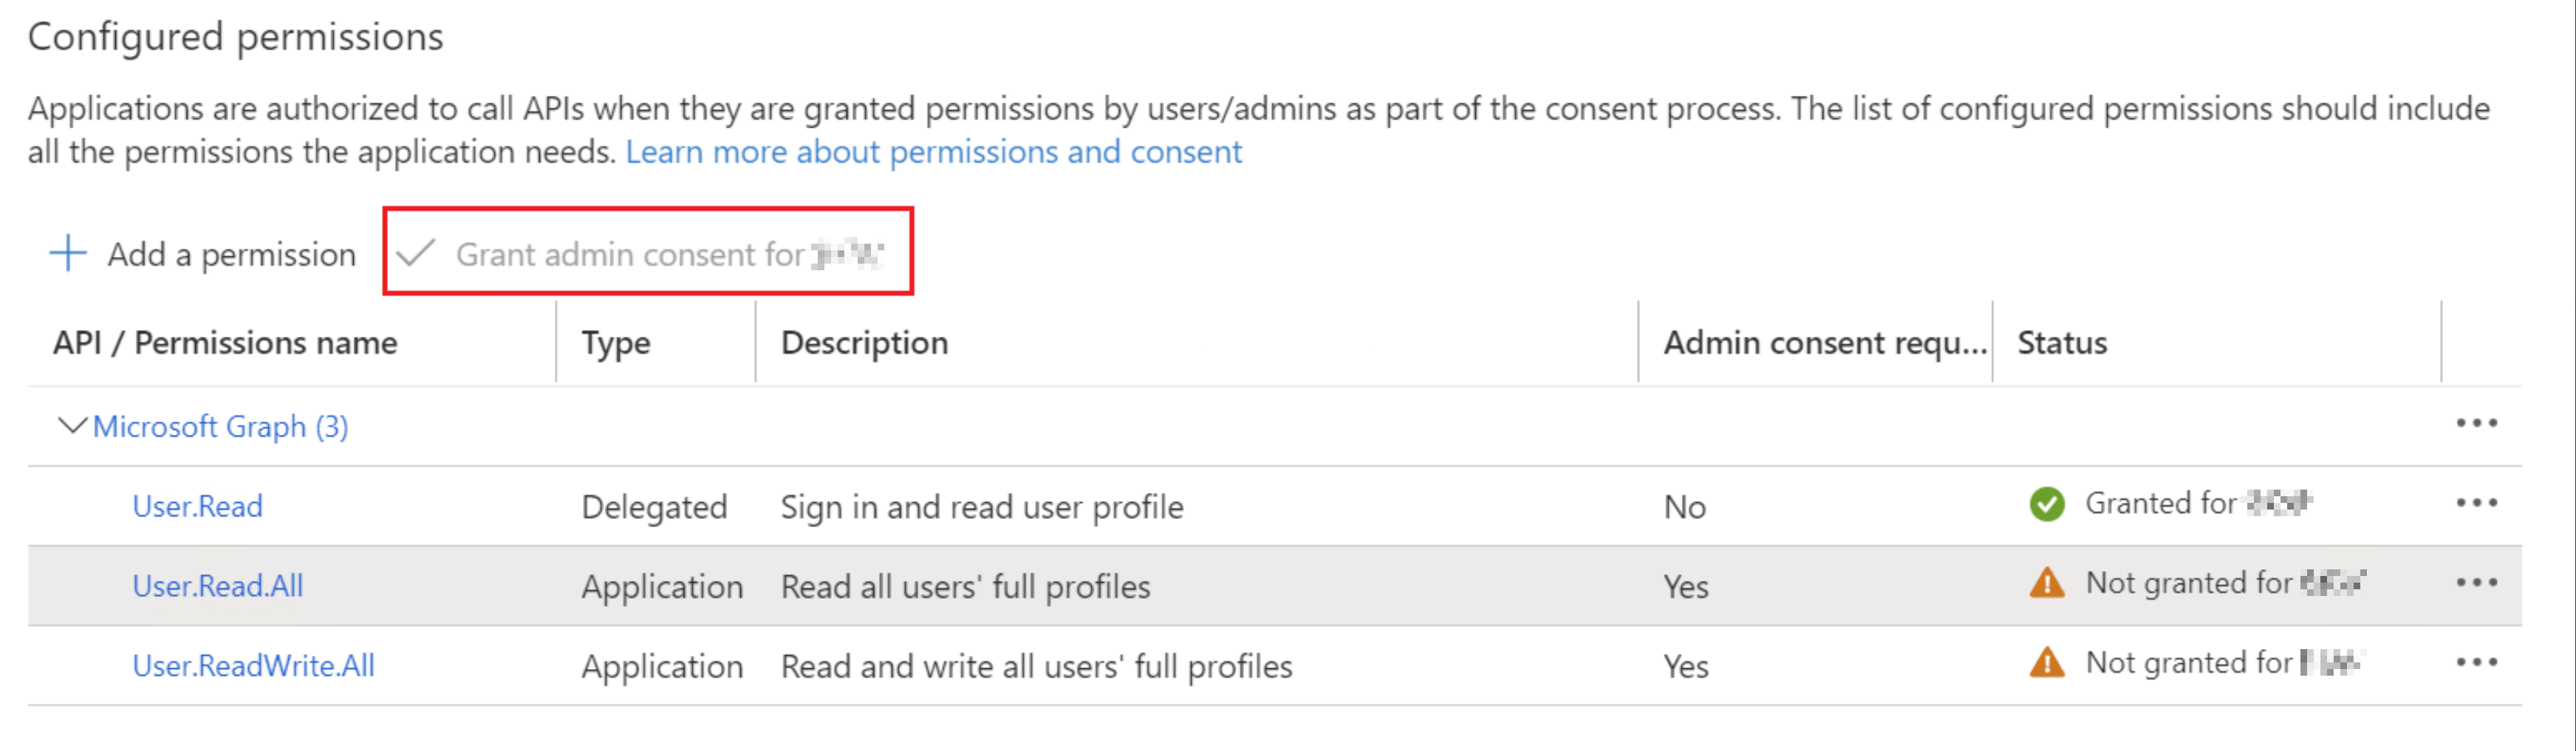
Consent assigned permissions
Now that the permission has been added thanks to the previous step, the last thing to do is to check it and then approve it. This can only be done with the "Global Administrator" role, as the app will then receive this permission forever and this is like assigning a role. The person who has Global Administrator must click on "Grand admin consent for <companyname>" in the app so that the permissions also become active.
Afterwards, the app can be used with the assigned permissions.