Microsoft Windows
- Quick commands
- Redirect Windows folder to OneDrive via PowerShell
- Advanced registry tweaks
- Workaround for problems with local permission groups and cached Entra ID users
- Upgrade Windows Home to Pro in OOBE
- Manually Trigger a Windows Feature Upgrade
Quick commands
Local User Management
Add Entra ID User to local Administrator Group
$UPN = "<yourupn>"
Add-LocalGroupMember -SID 'S-1-5-32-544' -Member "AzureAD\$UPN+
Add Entra ID User to local Remote Desktop Users Group
$UPN = "<yourupn>"
Add-LocalGroupMember -SID "S-1-5-32-555" -Member "AzureAD\$UPN"
Remove Password for local User account
Set-LocalUser -name "<yourlocalusername>" -Password ([securestring]::new())KMS
Write KMS Server
Invoke-Expression "$env:windir\system32\cscript.exe $env:windir\system32\slmgr.vbs /skms kms.core.windows.net:1688"Read system information
Get serial number by cmd
wmic bios get serialnumberRead user information
Get AD group membership of user
This works on both AD joined and Microsoft Entra ID joined devices.
(New-Object System.DirectoryServices.DirectorySearcher("(&(objectCategory=User)(samAccountName=$($env:username)))")).FindOne().GetDirectoryEntry().memberOfSet NTP Server
This command sets the NTP server on a Windows. Multiple servers can be specified with spaces.
w32tm /config /manualpeerlist:"<ntpserverlist>" /syncfromflags:manual /reliable:yes /updateRedirect Windows folder to OneDrive via PowerShell
This PowerShell script is only usable for Windows
Use case
The following script lets you redirect the main folders of your Windows Explorer. This will ensure that all files and data are stored in the OneDrive storage solution managed by the company.
The only thing that needs to be manipulated is the "$CompanyName" variable, which requires the name of the company configured in Microsoft 365.
Script Code
This code must run on the computer in the context of the user.
$CompanyName = "LNC Freelancing"

$OneDrivePath = "$env:USERPROFILE\OneDrive - $CompanyName"

# Create New Folder
New-Item "$OneDrivePath\Desktop" -Type Directory -Force
New-Item "$OneDrivePath\Dokumente" -Type Directory -Force
New-Item "$OneDrivePath\Bilder" -Type Directory -Force
New-Item "$OneDrivePath\Videos" -Type Directory -Force
New-Item "$OneDrivePath\Musik" -Type Directory -Force

# Redirect the Desktop folder
New-ItemProperty -Path "HKCU:\Software\Microsoft\Windows\CurrentVersion\Explorer\User Shell Folders" -Name "{B4BFCC3A-DB2C-424C-B029-7FE99A87C641}" -Value "$OneDrivePath\Desktop" -PropertyType "ExpandString" -Force

# Redirect the Documents folder
New-ItemProperty -Path "HKCU:\Software\Microsoft\Windows\CurrentVersion\Explorer\User Shell Folders" -Name "{FDD39AD0-238F-46AF-ADB4-6C85480369C7}" -Value "$OneDrivePath\Dokumente" -PropertyType "ExpandString" -Force

# Redirect the Pictures folder
New-ItemProperty -Path "HKCU:\Software\Microsoft\Windows\CurrentVersion\Explorer\User Shell Folders" -Name "{33E28130-4E1E-4676-835A-98395C3BC3BB}" -Value "$OneDrivePath\Bilder" -PropertyType "ExpandString" -Force

# Redirect the Videos folder
New-ItemProperty -Path "HKCU:\Software\Microsoft\Windows\CurrentVersion\Explorer\User Shell Folders" -Name "{18989B1D-99B5-455B-841C-AB7C74E4DDFC}" -Value "$OneDrivePath\Videos" -PropertyType "ExpandString" -Force

# Redirect the Music folder
New-ItemProperty -Path "HKCU:\Software\Microsoft\Windows\CurrentVersion\Explorer\User Shell Folders" -Name "{4BD8D571-6D19-48D3-BE97-422220080E43}" -Value "$OneDrivePath\Musik" -PropertyType "ExpandString" -Force
Advanced registry tweaks
Enable verbose status messages
Configure Windows so that you receive verbose startup, shutdown, logon, and logoff status messages. Verbose status messages may be helpful when you're troubleshooting slow startup, shutdown, logon, or logoff behavior.
Path
Computer\HKEY_LOCAL_MACHINE\SOFTWARE\Microsoft\Windows\CurrentVersion\Policies\System
DWORD Key
verbosestatus = 1
Workaround for problems with local permission groups and cached Entra ID users
Problem description
Microsoft has a bug with local permission groups (e.g. Administrators & Remote Desktop Users) on Windows 10 & 11. If you use Microsoft Entra ID user objects to grant permissions onto Microsoft Entra ID joined devices you can do this either directly (as described here: Quick commands (Windows) | LNC DOCS (lucanoahcaprez.ch)) or using Microsoft Entra ID groups.
When using these groups you only see the SID of the group and their users are cached locally at the moment the group is added to the device. If you subsequently fill Microsoft Entra ID users into the Microsoft Entra ID groups, exactly this bug will occur. Then the new user entity will have no permissions. There is this workaround for this.
Force user object sync
The basic idea is that the user logs in once with normal authorizations and thus triggers user synchronization on the device. One solution is for the user to log in to the device normally.
If this is not possible, for example because you are connected to a customer or the permissions are used for support purposes, the following can be done:
1. Open the file location of any program:
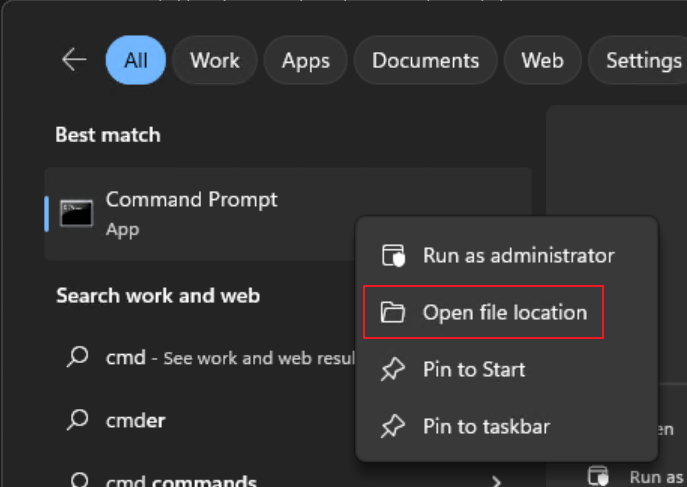
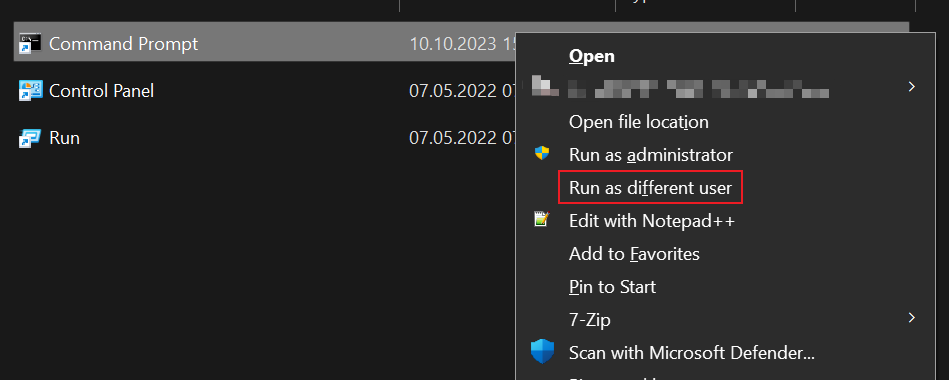
2. Run executable using the credential of the Microsoft Entra ID user account with the problems. Select "Run as different user".
3. Enter the UPN and password from the affected user account.
4. Check if the program is in the context of the appropriate user. For the example of "cmd" enter this and confirm the correct username:
whoami5. Close window and now the permissions are synced correctly. You can now continue with the work that caused the problem in the first place.
Upgrade Windows Home to Pro in OOBE
It is possible that Windows Home devices have been purchased or are available. As these cannot be set up using Intune or require the Pro version for a managed state, these instructions can be carried out for an upgrade.
The Pro version of Windows does not have to be copied to the internal disk via a USB stick, but can be modified from the existing Windows version, which saves time and effort.
Important: The license for WIndows Pro must of course also be available. Here only the WIndows is switched to Pro but not licensed.
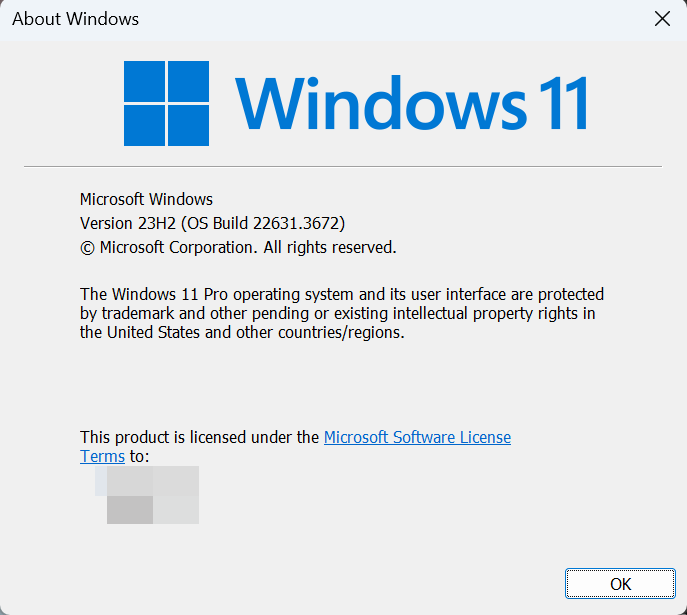
Check Windows Version
To make sure you have the right version, there is the "winver" tool. Here you can check the installed version relatively easily.
The program is available in OOBE mode (Out of the box experience) but also on a pre-installed windows.
Regular Installation
- Open CMD or WIN + R
- Type "winver"
OOBE
- Open CMD window with "SHIFT" + "F10".
- Type "winver".
- If the Version sais "Windows Home" you should work through the Guide.
Guide
- Open CMD window with "SHIFT" + "F10".
- Run the following commands in this order:
slmgr.vbs
DISM /online /Get-TargetEditions
sc config LicenseManager start= auto & net start LicenseManager
sc config wuauserv start= auto & net start wuauserv
changepk.exe /productkey VK7JG-NPHTM-C97JM-9MPGT-3V66T
The device will reboot after running the fifth command.
Make sure to check the Windows version afterwards using the same tools as above.
Manually Trigger a Windows Feature Upgrade
Warning: Proceed only if you understand the risks. Manually forcing a Windows Feature Upgrade can bypass important compatibility checks, potentially leading to system instability or hardware issues. Always back up your data beforehand. This process requires administrative privileges and is recommended only for advanced users in testing or controlled environments. Do not use on critical production systems.
Sometimes, Windows Feature Updates fail due to Group Policies, Windows Hello for Business (WHfB), or unknown errors. In such cases, manually triggering the upgrade can help standardize versions, fix issues, or bypass restrictions. This guide shows how to do that using PowerShell.
Use Cases
-
Remediate Upgrade Rollbacks: Force reinstallation after automatic rollback due to compatibility checks or silent failures.
- Bypass WHfB or Group Policy Blocks: Manually install updates when Windows Hello for Business or update policies prevent standard delivery.
- Troubleshoot Upgrade Issues: Isolate and resolve problems by cleanly forcing the upgrade outside the normal update pipeline.
- Manually Align Device Versions: Standardize Windows versions across machines for testing, support, or software compatibility.
PowerShell Script
This script downloads the official Windows Upgrade tool to a temp folder and silently starts the upgrade in the background with logging enabled — no user input required.
To run the script on a device where you have access to, follow these steps:
- Download PSExec from Microsoft: PsExec - Sysinternals | Microsoft Learn
-
Open PowerShell as Administrator and run ".\PsExec.exe -i -s powershell.exe"
-
Paste and run the script:
$dir = "$($env:Temp)\FU"
if (Test-Path $dir) {
    Remove-Item "$($dir)\Win11Upgrade.exe" -Force
} else {
    New-Item -Path $dir -ItemType Directory
}

$webClient = New-Object System.Net.WebClient
$url = 'https://go.microsoft.com/fwlink/?linkid=2171764'
$file = "$($dir)\Win11Upgrade.exe"


$webClient.DownloadFile($url, $file)

Start-Process -FilePath $file -ArgumentList "/quietinstall /skipeula /auto upgrade /copylogs $($dir)"
After the script was deployed to the clients, you can get the status of the process using the following command:
Get-Process Windows10UpgraderApp