Azure Automation Accounts
- How to Runbook
- Runbook concept with PowerShell
- Create Runbook Job via Webhook and Azure Management API
- Use System Managed Identity for authentication against Microsoft Graph API
How to Runbook
This guide is a quick manual for an Azure Runbook. Here is a brief description of the prerequisites and definitions that must be met in order to create an automation via Azure Runbooks.
Prerequisites
Defined goal
A defined goal is necessary that we can check if our end product is doing what we are expecting. This can be as simple as one phrase.
Example:
My Azure Runbook should start by a manual trigger and create a new enrollment service profile via Graph API in Intune. As a result, it should return a success-code and the name and id of the new enrollment service profile.
Defined input
To know how to start the code, we first need to define the input(s) we need to get with the trigger to reach our goal. This must be a static text input.
Example:
- Variable 1: $ServiceProfileName = <textinput>
- Variable 2: $GroupId = <idinput>
- Variable 3: $CompanyName = <companyname>
Defined output
The output should include the name and the id of the created enrollment service profile and if the script was run successful.
Example:
ESP-WIN-LNC-DEVICE-CompanyEnrollment-PROD // 396e26cb-d657-4a4e-8beb-105ba1984c63

Script finished successfully
Trigger method
The method is important that we know what oder which object(s) are triggering this runbook. This could be a manual user via the Azure Portal or via the Azure Management API. Furthermore, it could be a third-party system, like ServiceNow or a schedule.
Example:
This Azure Runbook should get triggered manually via the Azure Portal.
Logic model
The logic model defines the logic of the code in a very high-level draft.
Example:
- Get Input
- Check input values
- Create JSON body for Graph API
- Post JSON body to Graph API
- Get response from Graph API
- Write response in output
Decisions
Coding language
Azure Runbooks can execute different code with different languages. This is defined per Azure Runbook. To change the Runbooks coding language, you can create a new Runbook in the Automation Account. Azure Runbooks offers these languages for code execution:
- PowerShell
- Python
Runtime
On which environment should the Runbook run on? You can choose between Azure managed hosts or hybrid worker. Hybrid worker brings the advantage that you can connect to on premise resources and bypass some restrictions which can occur if Azure is selected as runtime.
Procedure
Create Automation Account
Automation Accounts are the container which contains all the information, secret, Runbook and more. You can create one Automation Account for all your Runbooks. However, it is a good idea if the automation accounts are subdivided according to the technologies that will be automated.
Create runbook
The runbook contains the code which will be executed. On creation you have to select which type it should create. This is a selection of the mentioned coding languages.

Code
When created you can copy your code into the web editor of the Function or start to develop the code directly in the Azure Portal.
Testing
For testing you don't have to leave the Azure Portal. While developing you are able to activate the "Test pane". There you can enter the variables if parameters are defined on the top level in the code.

param (
    [Parameter (Mandatory = $true)]
    [object] $Email,
    [Parameter (Mandatory = $true)]
    [object] $deviceName
)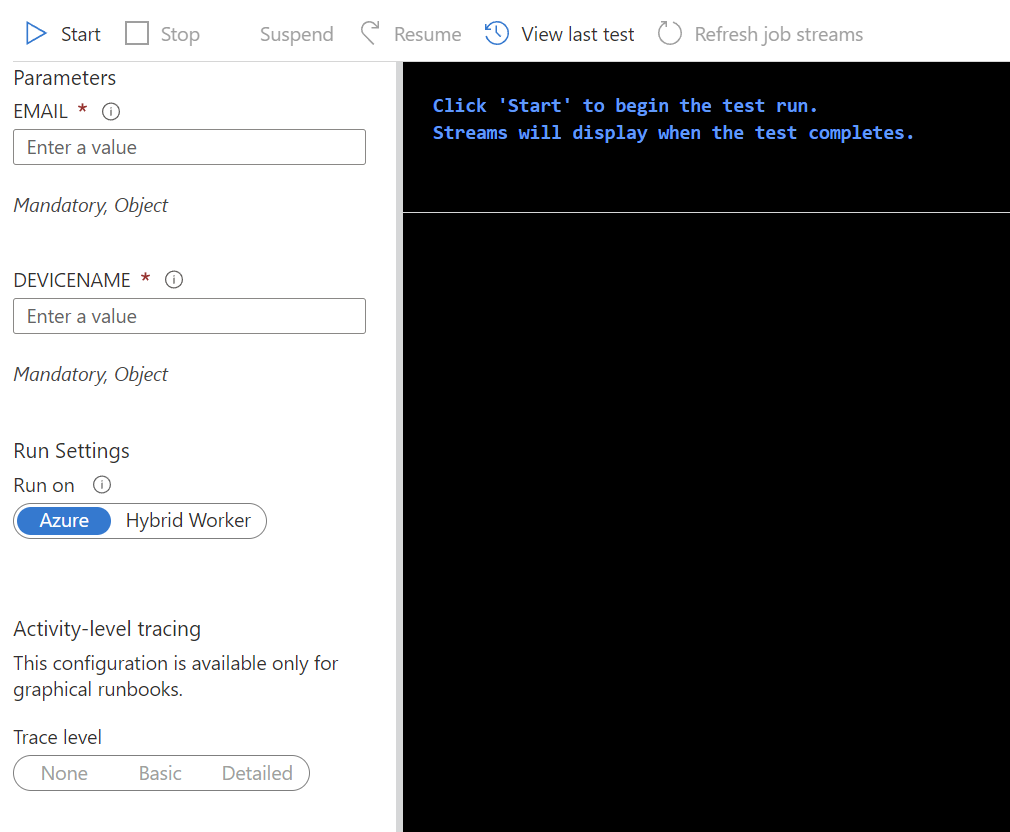
This is the result view in the Azure Portal if parameters are defined in the code.
Deploy
To deploy the code you have to publish the code in the editor view.

After that you are able to start the Runbook via the normal Azure Runbook GUI. This will then use the latest published version of the code.

Things to consider
Hybrid worker
To use a hybrid worker, you have to deploy an Azure VM, or an Azure Arc enabled VM which is always online. This means that the costs are not very low to use on prem scripts via Azure Runbooks.
Stacking of requests
Azure Runbook stacks the requests. So, if 100 requests are made, the code execution is asynchronous and you have to wait until all jobs (requests) were processed.
Runbook concept with PowerShell
Here I describe how to create automations using runbooks. The PowerShell scripts can either run in the Azure environment or on the hybrid workers, which are joined in a domain and can thus access internal resources. The file structure and all resources are displayed and edited via the Azure portal.
Runbooks are executed asynchronously. This means that the first execution is completely finished until the next request is processed (big difference to Azure Functions!). This also means that several executions are stacked (queued) and only one execution is possible in parallel at a time.
Runbooks
In Azure Automation Accounts, runbooks are the PowerShell scripts that are executed regularly, on user action or via third party applications. These are created in the corresponding automation account according to the technology. These runbooks can then be equipped with other resources such as schedules or credentials.
The runbooks should be named according to the abbreviation corresponding to the environment (AD, MEID, CPC, MW, SPO, EXO, TEA, etc.) and the abbreviation "RB". In addition, a short name that is as meaningful as possible should be used for the action of the script.
Example:
- RB-EXO-PRD-PS1-CreateDomainByCompany-PROD-WE
- RB-MEID-ALL-PS1-CleanUpMEIDDevices-PROD-WE
Automation Credentials
App Registrations and Service Accounts Credentials can be stored in the Automation Credentials. These are to be stored according to the following concept. Usernames and passwords, but also Secret ID and Client Secrets can be stored here. It is also important here that the corresponding resource names (account name, app registration name) are contained one-to-one.
Example:
- CRED-RB-PRD-CRED-CleanUpMEIDDevices-PROD-WE
- CRED-RB-ALL-CRED-CleanUpMEIDDevices-PROD-WE
Access in the PowerShell script to the corresponding variables
$CredentialObject=Get-AutomationPSCredential -Name 'CRED-RB-ALL-CRED-CleanUpMEIDDevices-PROD-WE'
$Password = $CredentialObject.GetNetworkcredential().password

$Username = $CredentialObject.GetNetworkcredential().username
Certificates
The certificate storage of Azure Runbooks can be used so that authentication can also be performed using certificates.
Example:
- CERT-RB-PRD-CERT-CleanUpMEIDDevices-PROD-WE
- CERT-RB-ALL-CERT-CleanUpMEIDDevices-PROD-WE
Variables
Under variables, contents and strings can be stored that simply have to be adapted or should not be hardcoded in the script.
Example:
- VAR-RB-PRD-CLIENTID-CleanUpMEIDDevices-PROD-WE
- VAR-RB-ALL-CLIENTID-CleanUpMEIDDevices-PROD-WE
Access in the PowerShell script to the corresponding variables
$ClientId=Get-AutomationVariable -Name "VAR-RB-PRD-CLIENTID-CleanUpMEIDDevices-PROD-WE"PowerShell Modules
In order to use PowerShell modules, they must first be added to the Azure Automation account. This can be achieved in the Automation Account via "Modules" → "Add a Module" → "Browse from Gallery".
Import module into PowerShell script
Import-Module AzureADSchedules
The schedules are finally mapped to the runbook. These can be set granularly on a weekly, daily or hourly basis. The following concept is also used in the schedule name. In addition to the action name, the abbreviation "RB" for runbook is added here. In addition, there is one of the following regularity descriptions:
- Hourly
- Daily
- Weekly
- Monthly
- Yearly
- 12Hourly
Example:
- SCED-RB-PRD-DAILY-CheckLicenseCount-PROD-WE
- SCED-RB-PRD-WEEKLY-CleanUpMEIDDevices-PROD-WE
Triggers
Triggers mean types to call the Azure Runbooks and execute the code.
Manual
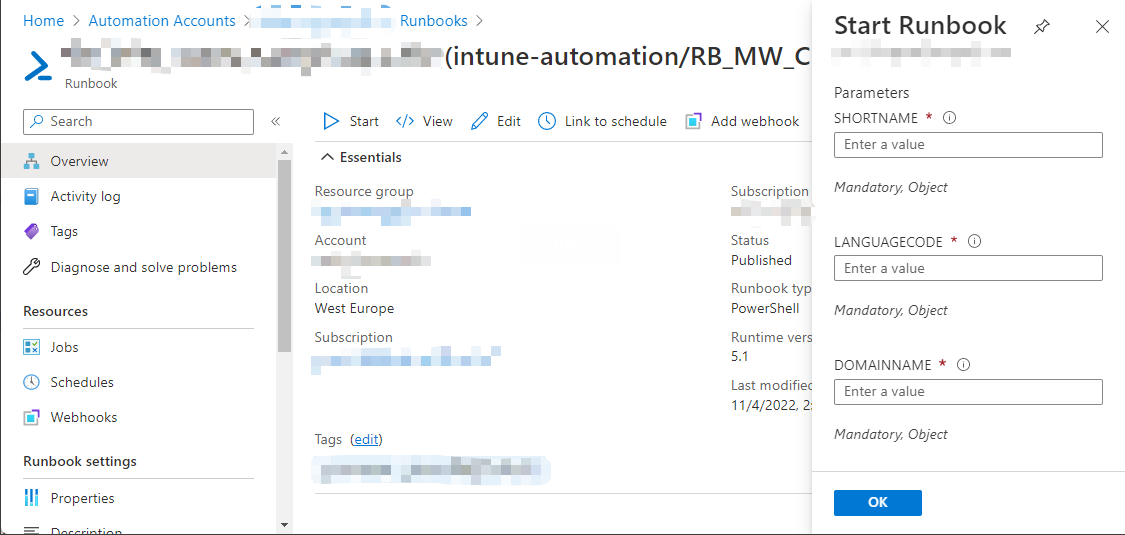
Azure Runbooks can be conveniently executed via the GUI. The required parameters can also be entered in the GUI Form.
Schedules
Schedules can be defined in the Automation Account. This allows scripts to be run on a regular basis. These schedules can then be assigned to the runbooks. To remain transparent, only one schedule per runbook and one runbook per schedule may be used.
PowerShell
A runbook can also be executed via PowerShell. However, a webhook must be created for this, via which a runbook job can be created. Since runbooks do not automatically return the response and can take several hours to execute, the PowerShell script must also wait for the output. Here we see an example where a PowerShell script waits 165 seconds for the job output and terminates otherwise.
# Create AzRUN Job
$url = "<yourrunbookwebhookurl>"
$Body = @"
{
    "email":"$Email"
}
"@
$JobId = Invoke-RestMethod -Method POST -Uri $url -Body $Body
$JobId = $JobId.JobIds

$whilecounter = 1


# Get AzRUN Job Output
$url = "https://management.azure.com/subscriptions/<subscriptionid>/resourceGroups/<resourcegroupname>/providers/Microsoft.Automation/automationAccounts/<automationaccountname>>/jobs/$JobId/?api-version=2019-06-01"
$Response = Invoke-Restmethod -uri $url -Method GET -Headers $Headers
$response.properties.provisioningstate
while($response.properties.provisioningstate -ne "Succeeded"){
    Start-Sleep 15
    $Response = Invoke-Restmethod -uri $url -Method GET -Headers $Headers
    $response.properties.provisioningstate
    if($whilecounter -le 10){
        $whilecounter ++
    }
    else{
        Write-Error "Get JobOutput from Runbook failed. Exiting Script."
        Exit 1
    }
}

$outputurl = "https://management.azure.com/subscriptions/<subscriptionid>/resourceGroups/<resourcegroupname>/providers/Microsoft.Automation/automationAccounts/<automationaccountname>>/jobs/$JobId/output?api-version=2019-06-01"
$Language = Invoke-Restmethod -uri $outputurl -Method GET -Headers $Headers
ServiceNow
ServiceNow has a spoke for interaction with Azure Automation accounts and can use it to execute runbooks and read out their feedback. SNOW receives authorisation for access via a service account. This account must be able to read all resource groups on the subscription and have the rights to execute runbooks on the automation account.
Authentication to Azure Automation Account
Authentication to the Azure Automation Account happens in exactly the same way in the frontend as well as via code. Here, the app registration must have the permission "user_impersonation" on the Azure API. Then all requests go via the API https://management.azure.com. Accordingly, the app registration must also be authorised in the IAM of the Azure Automation Account by means of Managed Identity.
Create Runbook Job via Webhook and Azure Management API
To create a Runbook Job you can use the Azure Management API in combination with the webhook feature from Azure Runbooks. This makes sure that you can execute a script with given parameters in a safe location (credential handling, reliability, on premise access and more).
Use case
To use the runbook to execute PowerShell code on a backend, you can create a Job from the client code with corresponding input values. Even if you want to get some information back from the Runbook, you can wait on the client side code for the response of the Runbook Job.
Example: Based on a UPN of a logged in user the language of his device should be set. In order to match the UPN in the database and get a predefined language, an Azure Runbook should be called by the client and return the language. This ensures that the credentials and network access to the database are stored securely.
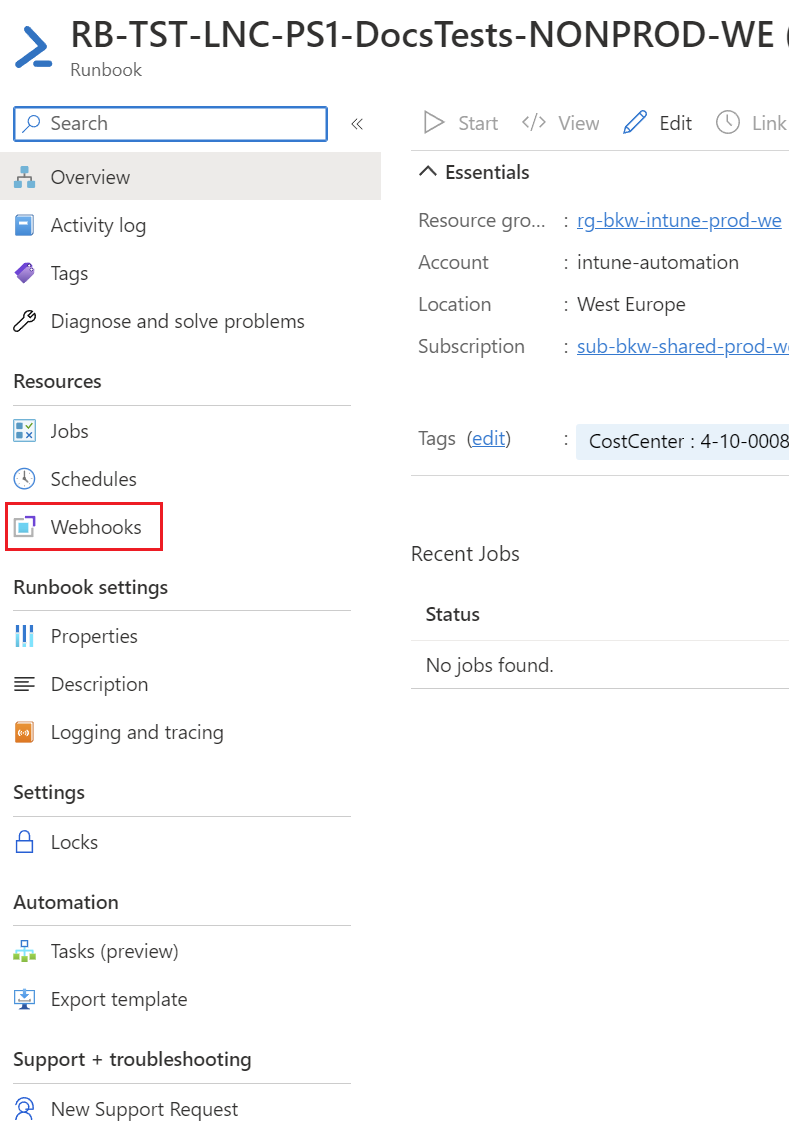
Create webhook URL
To create a webhook you have to open the Runbook and go to "Webhooks":
There you can create a new webhook and enter the name of the webhook, expiration date and you can view the URL. In addition, you can specify here where the runbook should be executed, whether in Azure itself or on a Hybrid Worker.
Attention: The URL is shown only once and should therefore be copied out.
Authentication to Azure Management API
The authorization against the Azure Management API can be solved via an app registration. For this you have to create an App Registration with the following permission:
Delegated: user_impersonation

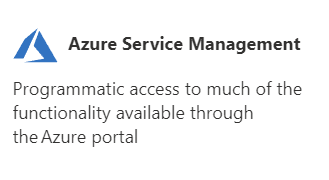
This permission can be added through the "Azure Service Management":
After that you have to use the access control blade of your Automation Account. There you have to grant the "Automation Job Operator" role to the App Registration. This process needs at least the "Application Administrator" role.
Then you can use the same header as for the Graph API as documented here: Create access token | LNC Docs (lucanoahcaprez.ch)
Get Webhook data from request body
To get the data of the requests body you first have to define a new parameter at the beginning of the Runbook script. Below you can filter out the body from the request and convert it from JSON to a PowerShell object. This can then be stored in normal variables or simply used for the further course of the script.
Param(
  [parameter (Mandatory=$false)]
  [object]$WebhookData
)
$WebhookBody = $WebHookData.RequestBody
$InputData = (ConvertFrom-Json -InputObject $WebhookBody)

$LanguageCode = $InputData.LanguageCode
$DomainName = $InputData.DomainName
Create Runbook Job via PowerShell
To create a Runbook Job you have to first use the Webhook feature. Then for getting the Jobs output, you have to wait until the Runbook is with the state "Succeeded".
# Create Runbook Job
$webhookurl = "<yourwebhookurl>"
$Body = @"
{
    "email":"$Email"
}
"@
$JobId = Invoke-RestMethod -Method POST -Uri $webhookurl -Body $Body
$JobId = $JobId.JobIds
Create loop from csv content
With the following script you can loop over content inside a csv and create a new Runbook job for every entry.
$Imports = Import-Csv -Path "<pathtocsv>" -Delimiter ";"
$webhookurl = "<yourwebhookurl>"

foreach($Import in $Imports){
    # Create Runbook Job
    $Body = @"
    {
        "languagecode":"$($Import.LanguageCode)",
        "domainname":"$($Import.DomainName)",
     }
"@

    Invoke-RestMethod -Method POST -Uri $webhookurl -Body $Body
}
Get Runbook job output via PowerShell
Here you can get the Runbook job output by a job id:
$subscriptionid = "<yoursubscriptionid>"
$resourcegroupname = "<yourresourcegroupname>"
$automationaccountname = "<yourautomationaccountname>"

$JobId = "<yourrunbookjobid>"

$whilecounter = 1

# Get Runbook job output
$url = "https://management.azure.com/subscriptions/$Subscriptionid/resourceGroups/$resourcegroupname/providers/Microsoft.Automation/automationAccounts/$automationaccountname/jobs/$JobId/?api-version=2019-06-01"
$Response = Invoke-Restmethod -uri $url -Method GET -Headers $Headers
# print out current state of Runbook Job
$response.properties.provisioningstate
while($response.properties.provisioningstate -ne "Succeeded"){
    Start-Sleep 15
    $Response = Invoke-Restmethod -uri $url -Method GET -Headers $Headers
    $response.properties.provisioningstate
    if($whilecounter -le 10){
        $whilecounter ++
    }
    else{
        Write-Error "Get job output from Runbook failed. Exiting Script."
        Exit 1
    }
}

$RunbookJobOutput = Invoke-Restmethod -uri $url -Method GET -Headers $Headers
Use System Managed Identity for authentication against Microsoft Graph API
Prerequisites: You must have Application Administrator role in Microsoft Entra ID (Bearer token must contain scope Applications.ReadWrite.All). Automation Account must be available. You have to be permitted to activate the System Managed Identity.
Managing authentication securely in Azure can be challenging, but leveraging System-Managed Identities simplifies access management while enhancing security. This guide walks you through the process of using a System-Managed Identity within an Azure Automation Account to authenticate against Microsoft Graph API.
Known limitations
- If you use PowerShell 7.2 in your Runbook you must use the older Module Version 2.25.0 of PowerShell Module Microsoft.Graph.Authentication. More details on the problem:
- Newer PowerShell Modules > 2.25.0 have dependency on dotnet 8.0. PowerShell 7.2 uses dotnet 6.0.
- PowerShell 7.4 (which has dotnet 8.0) is still not available in Azure Automation Accounts.
- Tracking of Issue on GitHub (Source of information): Associated GitHub Issue.
- Workaround: Create your Runbooks inside Runtime Environments with PowerShell 7.4.
- Assignment of Graph API permissions via the GUI to System Managed Identities is currently not supported. Only assignments via PowerShell is available.
System Managed Identities
First you need to decide if System Managed Identities are suitable for your needs. There are also User Managed Identities which serve a more dynamic approach (In short: Lifecycle of Identity object is not tied to the Azure Resource). Here you can see a comparison of the two options and some more explanation: Best practice recommendations for managed system identities - Managed identities for Azure resources | Microsoft Learn
If you want to have a deep understanding of the Service Principal architecture behind it, watch this deep dive session: Microsoft Azure Managed Identity Deep Dive - YouTube
Enable Identity on Azure Automation Account
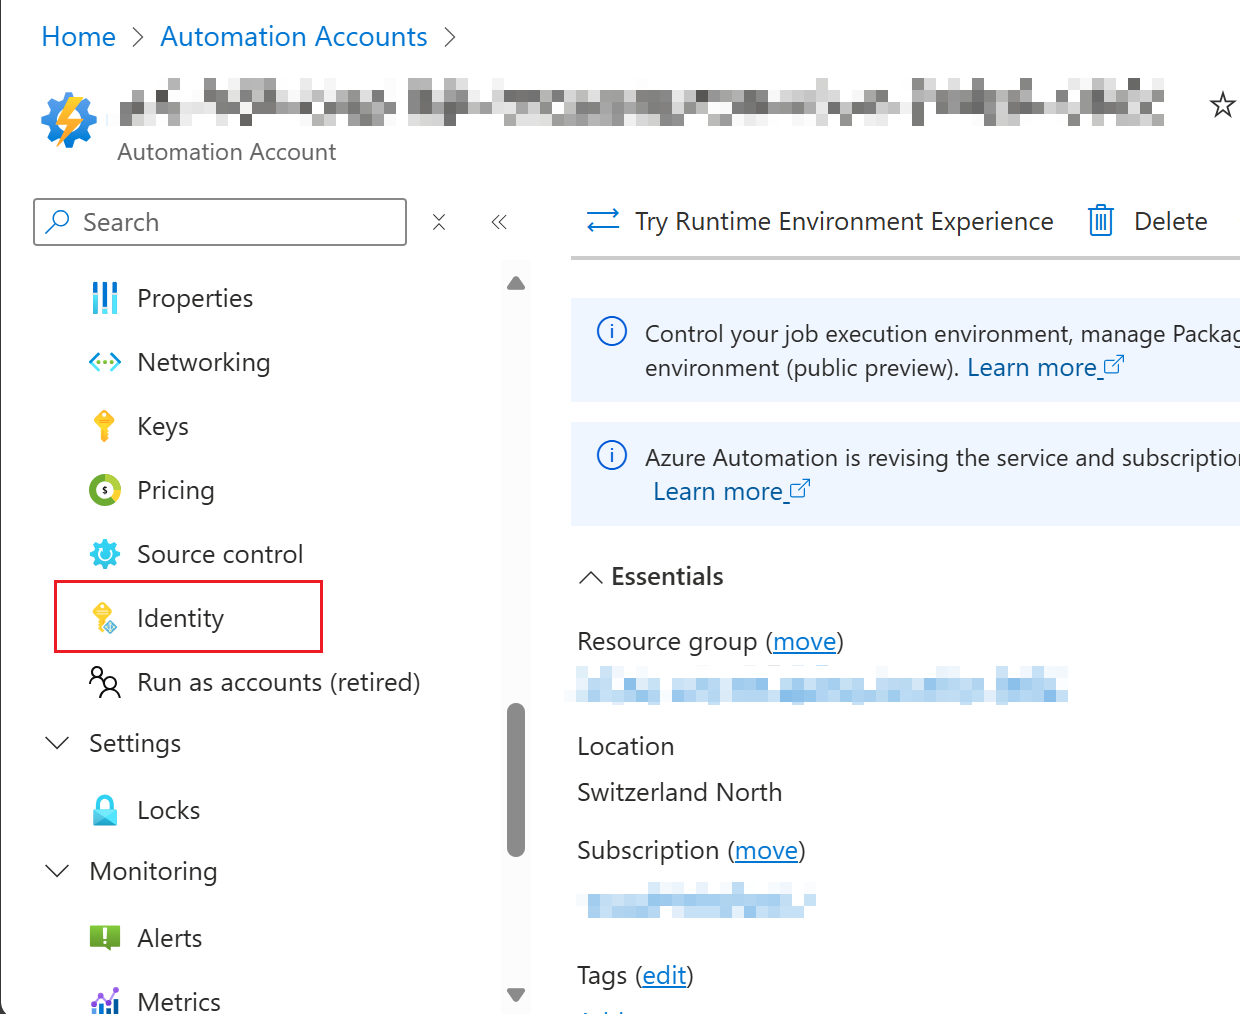
First open Azure Automation Account in Azure Portal (List all accounts: Automation Accounts - Microsoft Azure). Open the one you want to activate the managed identity.
|
Switch to tab "Identity" on the Automation Account page.
|
 |
|
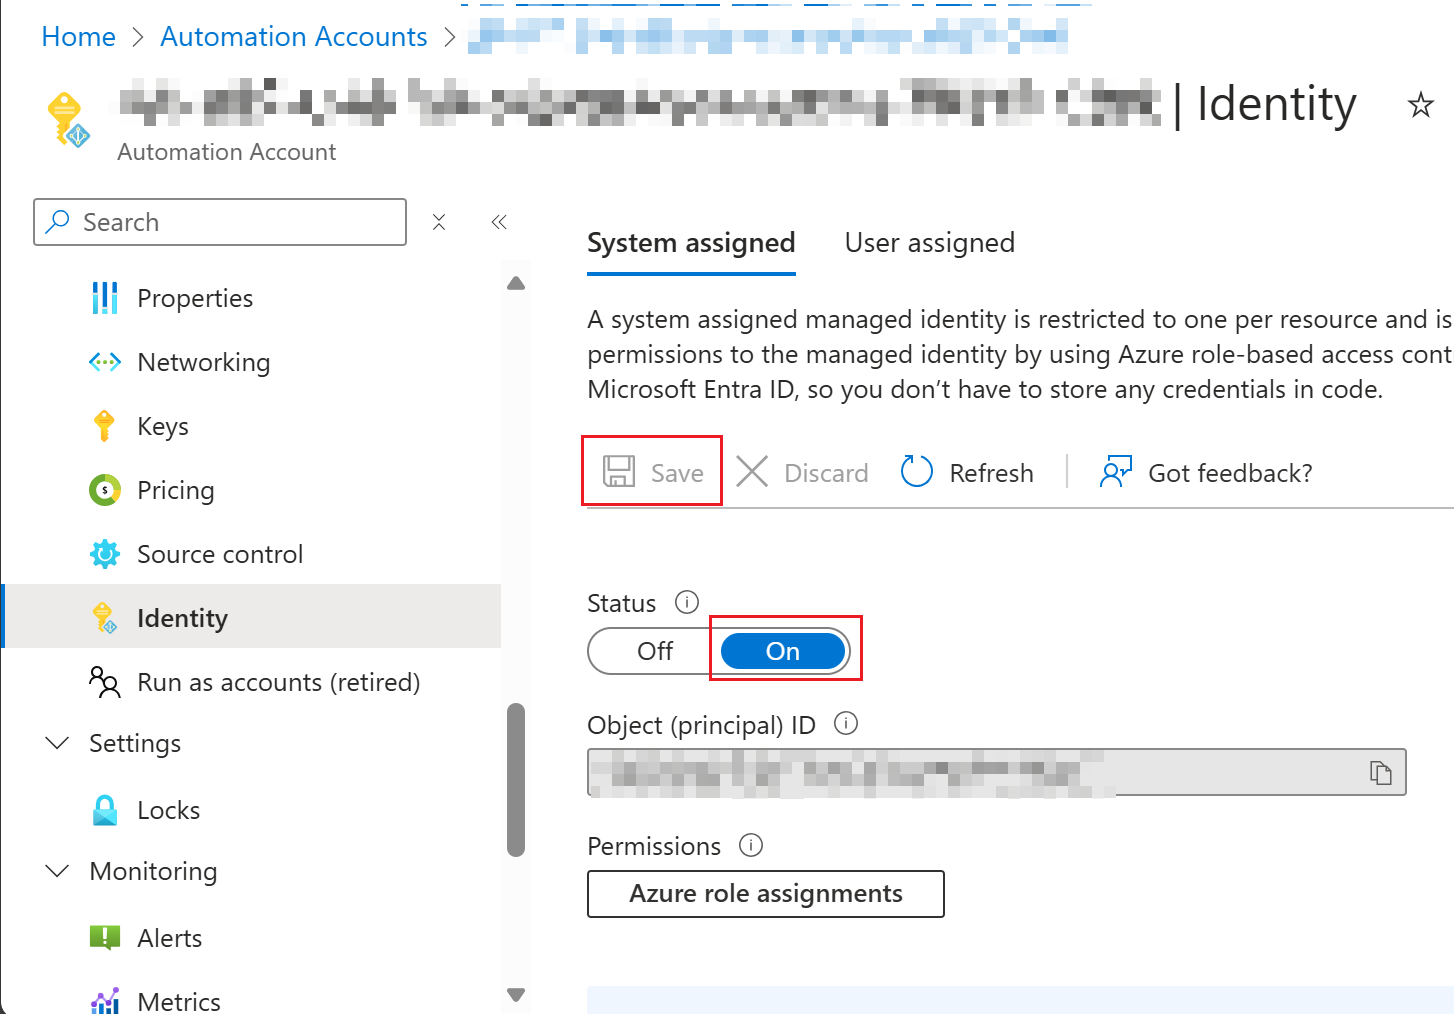
Switch Status to "On" and click "Save".
|
|
Verify System Managed Identity in Microsoft Entra ID
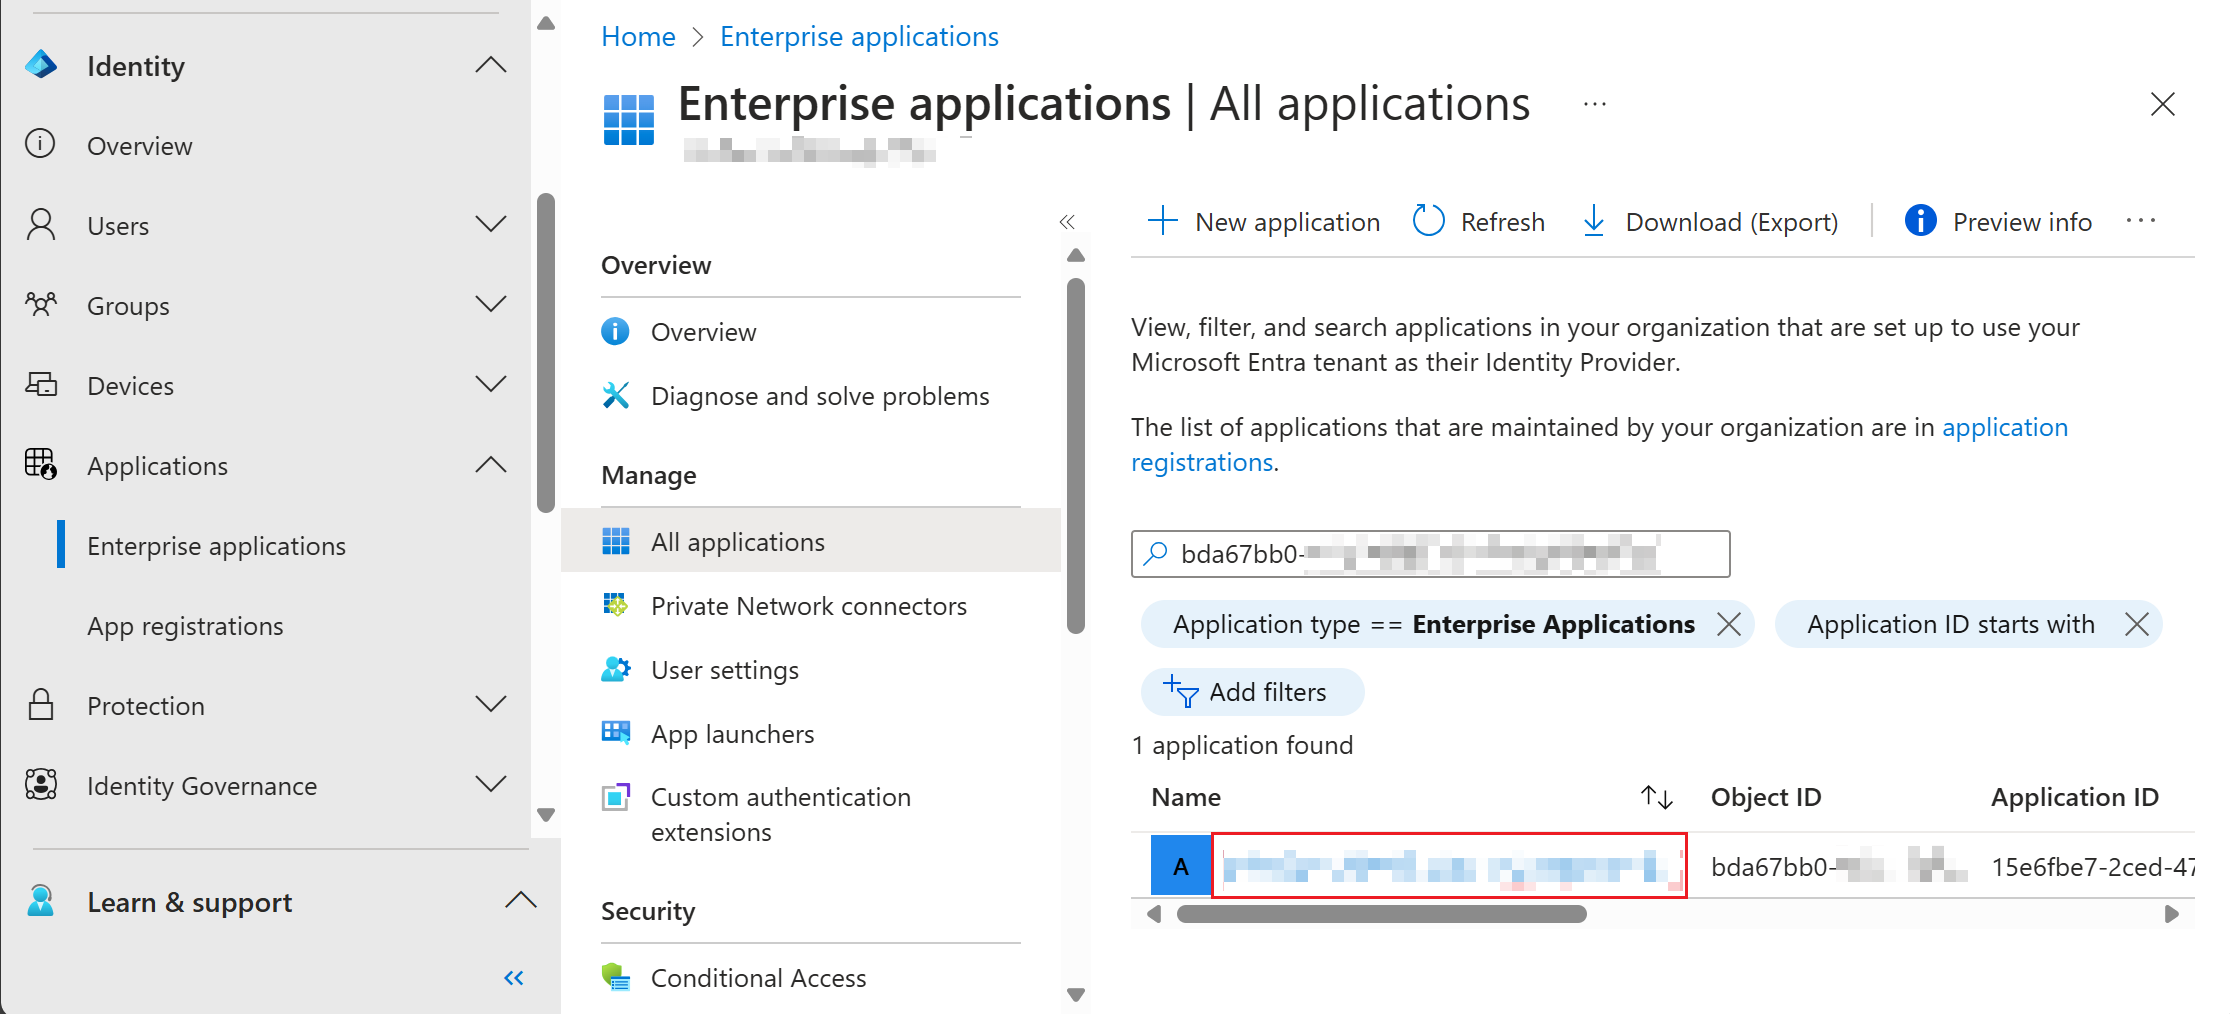
To verify if the System Managed Identity is successfully deployed, you can verify if the Service Principal of the Azure Resource is deployed correctly. Copy the Object ID of the created Service Principal (in view of screenshot above). Afterwards, open Microsoft Entra admin center and navigate to Enterprise Application (or use the direct link: Enterprise applications - Microsoft Entra admin center).
|
Search the Object ID of the Service Principal or search for the name of the Azure Resource. If found, click on the appropriate resource.
If the Service Principal is not yet displayed, wait a few minutes and try to refresh the view a bunch of times. |
|
|
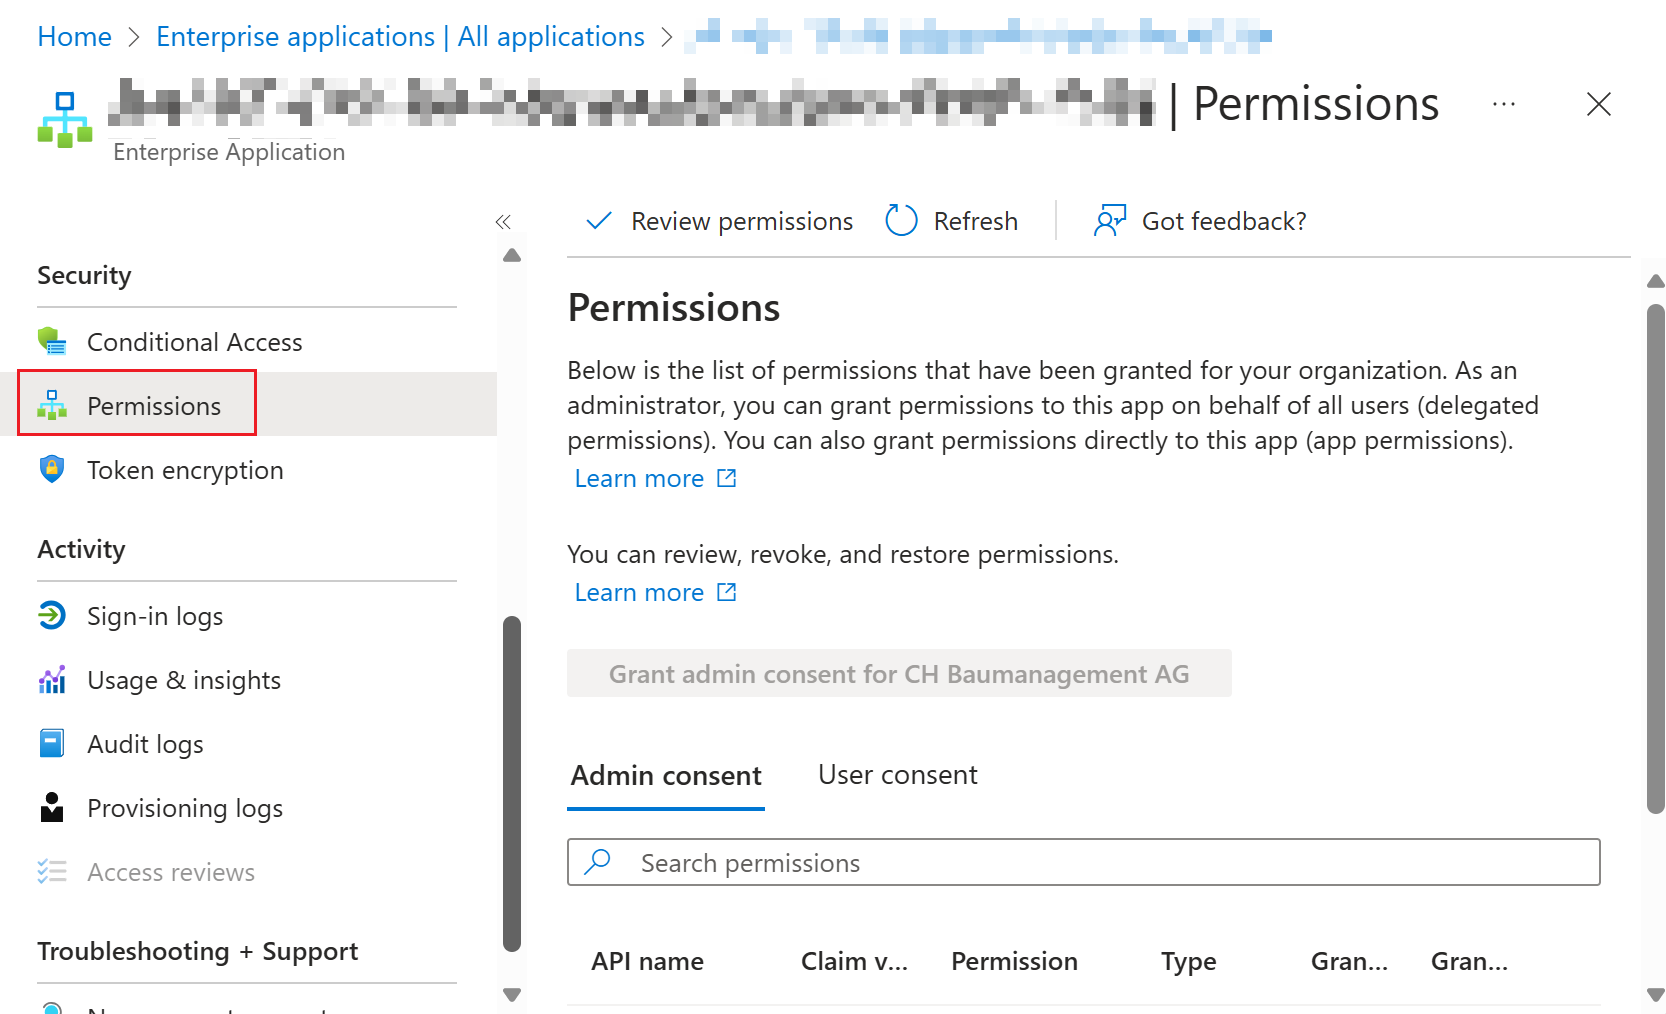
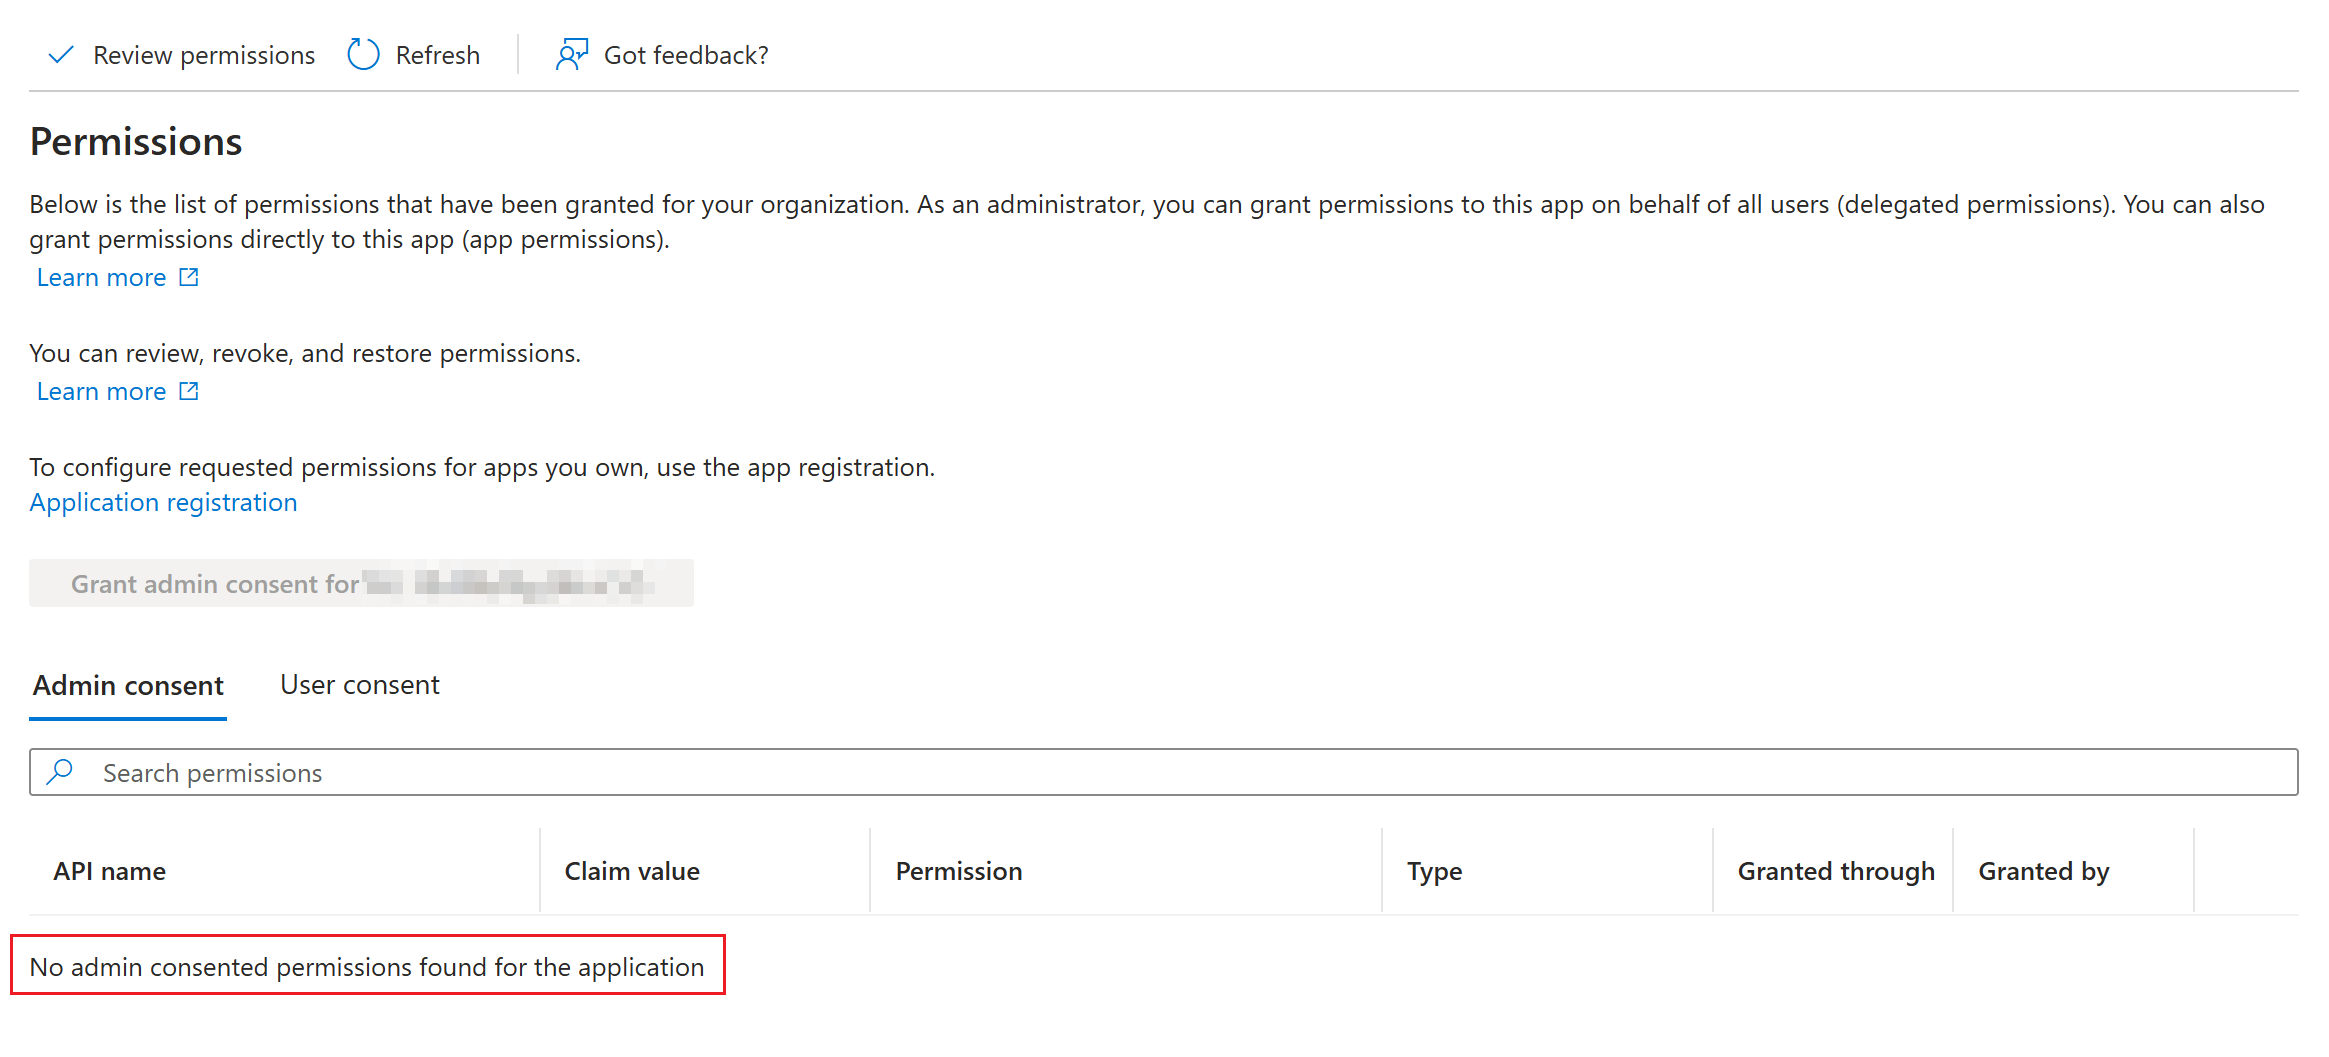
Scroll down in the menu and switch to the "Permissions" tab. Here are all Graph API permissions displayed. System Managed Identities only support permissions in "Admin consent" / Application context (no delegated permissions supported as there are no sign interactive sign ins by user objects).
|
|
|
Here you can review the permissions of the Managed Identity. If previously created, this list will be empty by default. Go to next chapter to assign Graph API permissions. |
|
Assign Graph API Permissions
Unfortunately the assignment of permissions to the System Managed Identity is not available via the Entra admin center. Therefore we have to use a PowerShell script to leverage the Graph API to assign the desired permissions.
You can save this script to your drive and then run it via ".\<yourscriptfilename>.ps1" or copy/paste the desired code blocks into a terminal. If you want to grant specific permissions to the Service Principal, you can adjust the list in $GrantGraphPermissions.
[CmdletBinding()]
param (
    [Parameter(Mandatory = $true)]
    [string]$AutomationAccountName,
    [Parameter(Mandatory = $true)]
    [string]$TenantID,
    [Parameter(Mandatory = $true)]
    [string]$SubscriptionID
)

Import-Module Microsoft.Graph.Authentication
Import-Module Az.Resources
Import-Module Az.Accounts

$GRAPH_APP_ID = "00000003-0000-0000-c000-000000000000"
$GrantGraphPermissions = @(
    "User.ReadBasic.All",
    "<addotherpermissions>"
)

$EntraIDRequiredPermissions = @(
    "AppRoleAssignment.ReadWrite.All",
    "Application.ReadWrite.All"
)

Update-AzConfig -EnableLoginByWam $false
Connect-AzAccount -TenantId $TenantID -Subscription $SubscriptionID
Connect-MgGraph -Scopes $($EntraIDRequiredPermissions -join ', ') -NoWelcome -ErrorAction Stop

Get-AzContext | Format-List
Get-MgContext | Format-List

$AutomationMSI = (Get-AzADServicePrincipal -Filter "displayName eq '$AutomationAccountName'")
Write-Host "Assigning permissions to $AutomationAccountName ($($AutomationMSI.Id))"

$GraphServicePrincipal = Get-AzADServicePrincipal -Filter "appId eq '$GRAPH_APP_ID'"
$GraphAppRoles = $GraphServicePrincipal.AppRole | Where-Object { $_.Value -in $GrantGraphPermissions -and $_.AllowedMemberType -contains "Application" }

if ($GraphAppRoles.Count -ne $GrantGraphPermissions.Count) {
    Write-Warning "App roles found: $($GraphAppRoles)"
    throw "Some App Roles are not found on Graph API service principal"
}

foreach ($AppRole in $GraphAppRoles) {
    Write-Host "Assigning $($AppRole.Value) to $($AutomationMSI.DisplayName)"
    New-MgServicePrincipalAppRoleAssignment -ServicePrincipalId $AutomationMSI.Id -PrincipalId $AutomationMSI.Id -ResourceId $GraphServicePrincipal.Id -AppRoleId $AppRole.Id | Out-Null
}
Add Graph Module to Automation Account
Open the Azure Portal and navigate to your Automation Account (List all accounts: Automation Accounts - Microsoft Azure).
PowerShell 7.4
PowerShell 7.4 requires a Runtime Environment in your Automation Account. Here is a guide on how to migrate to Runtime Environments: Azure Automation Runtime Environments Preview - Icewolf Blog
If you are already working with Runtime Environments on your Automation Account you can simply import the PowerShell module "Microsoft.Graph.Authentication" from PowerShellGallery and let it update automatically. Since PowerShell 7.4 is based on dotnet 8.0, the module version must be at least 2.26.0.
PowerShell 7.2
This is a workaround for Powershell Module "Microsoft.Graph.Authentication" for PowerShell 7.2 in version 2.25.0.
|
Open PowerShell 7 on your Mac or Windows Device. Run this command to export the Module to a file:
|
|
|
Compress the created folder to a zip archive. |
|
|
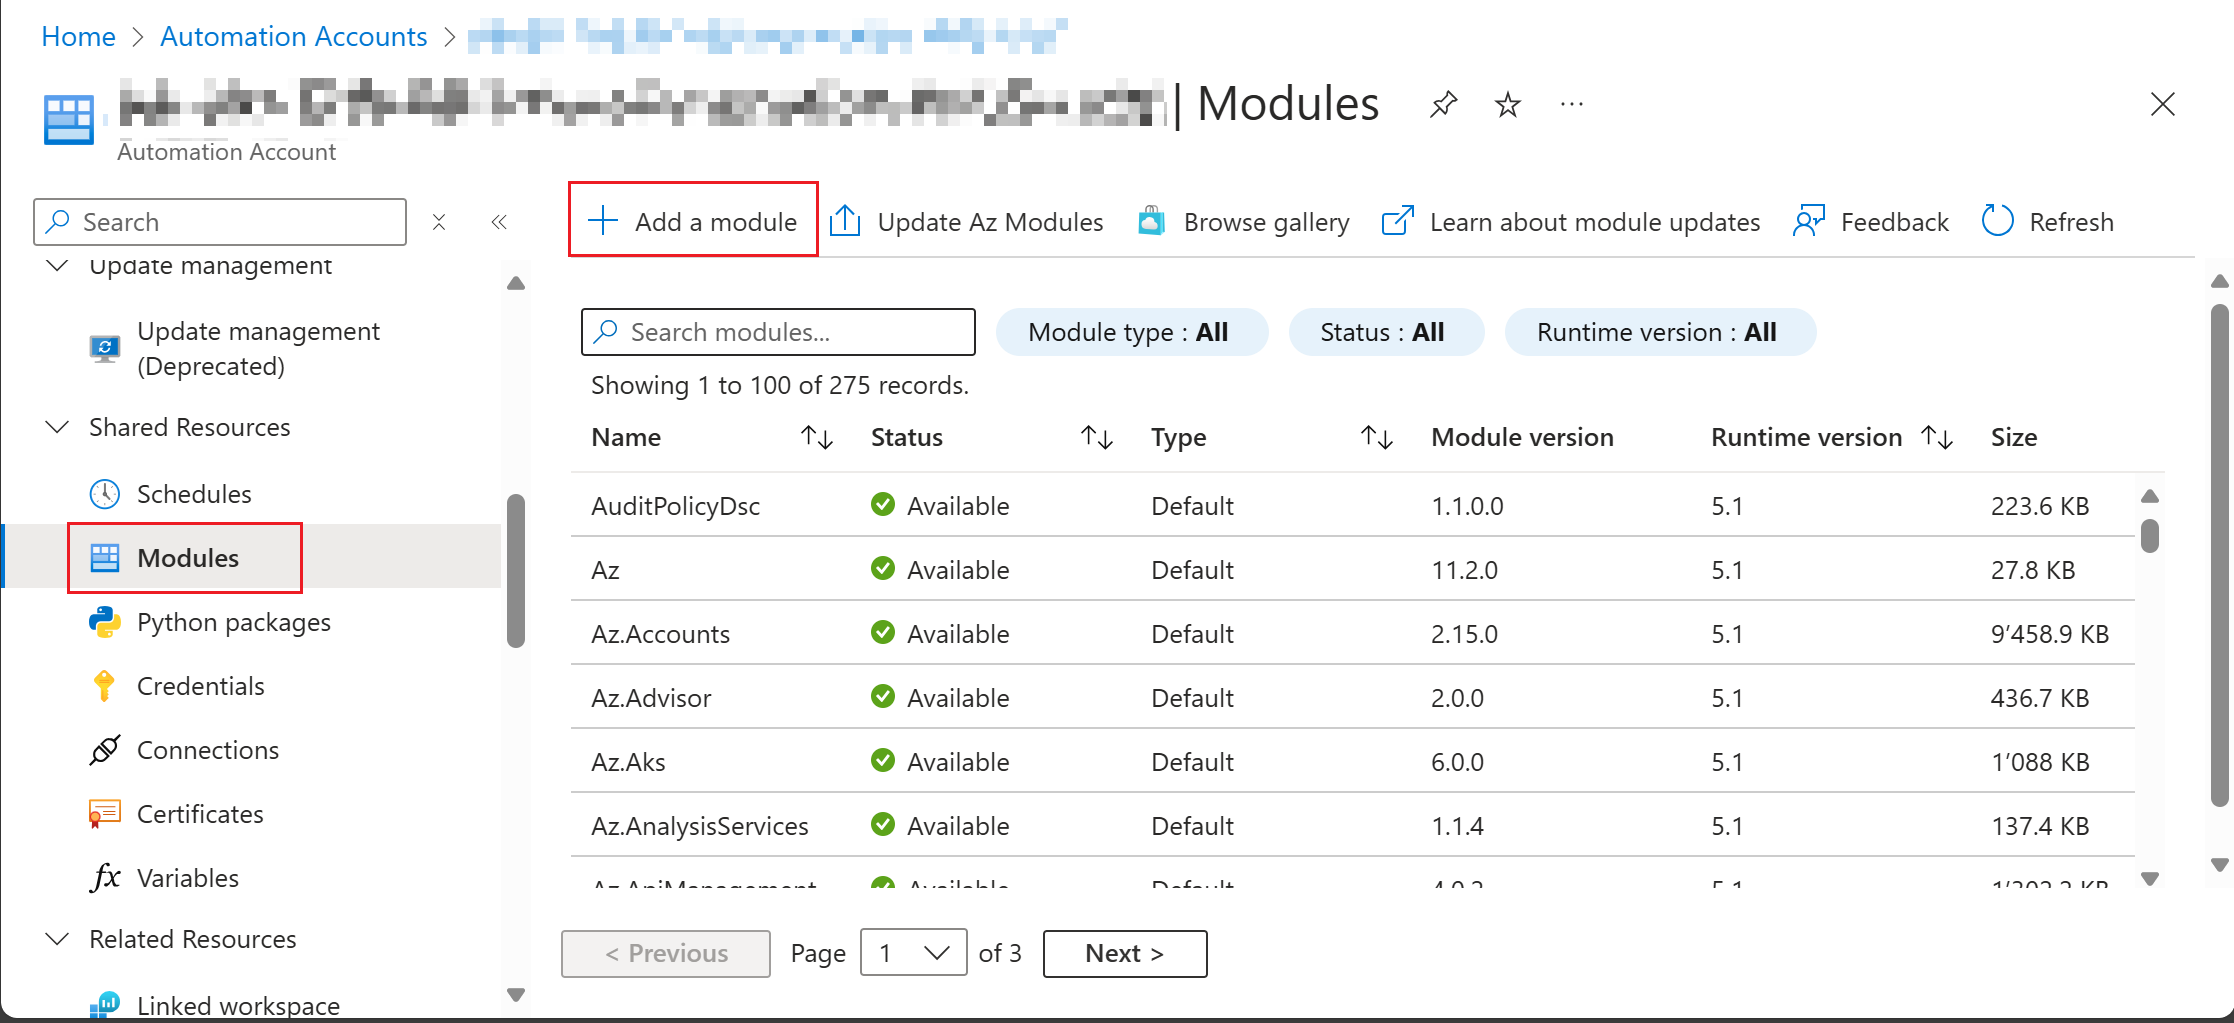
Switch to tab "Module" on the Automation Account page and click "Add a module". |
|
|
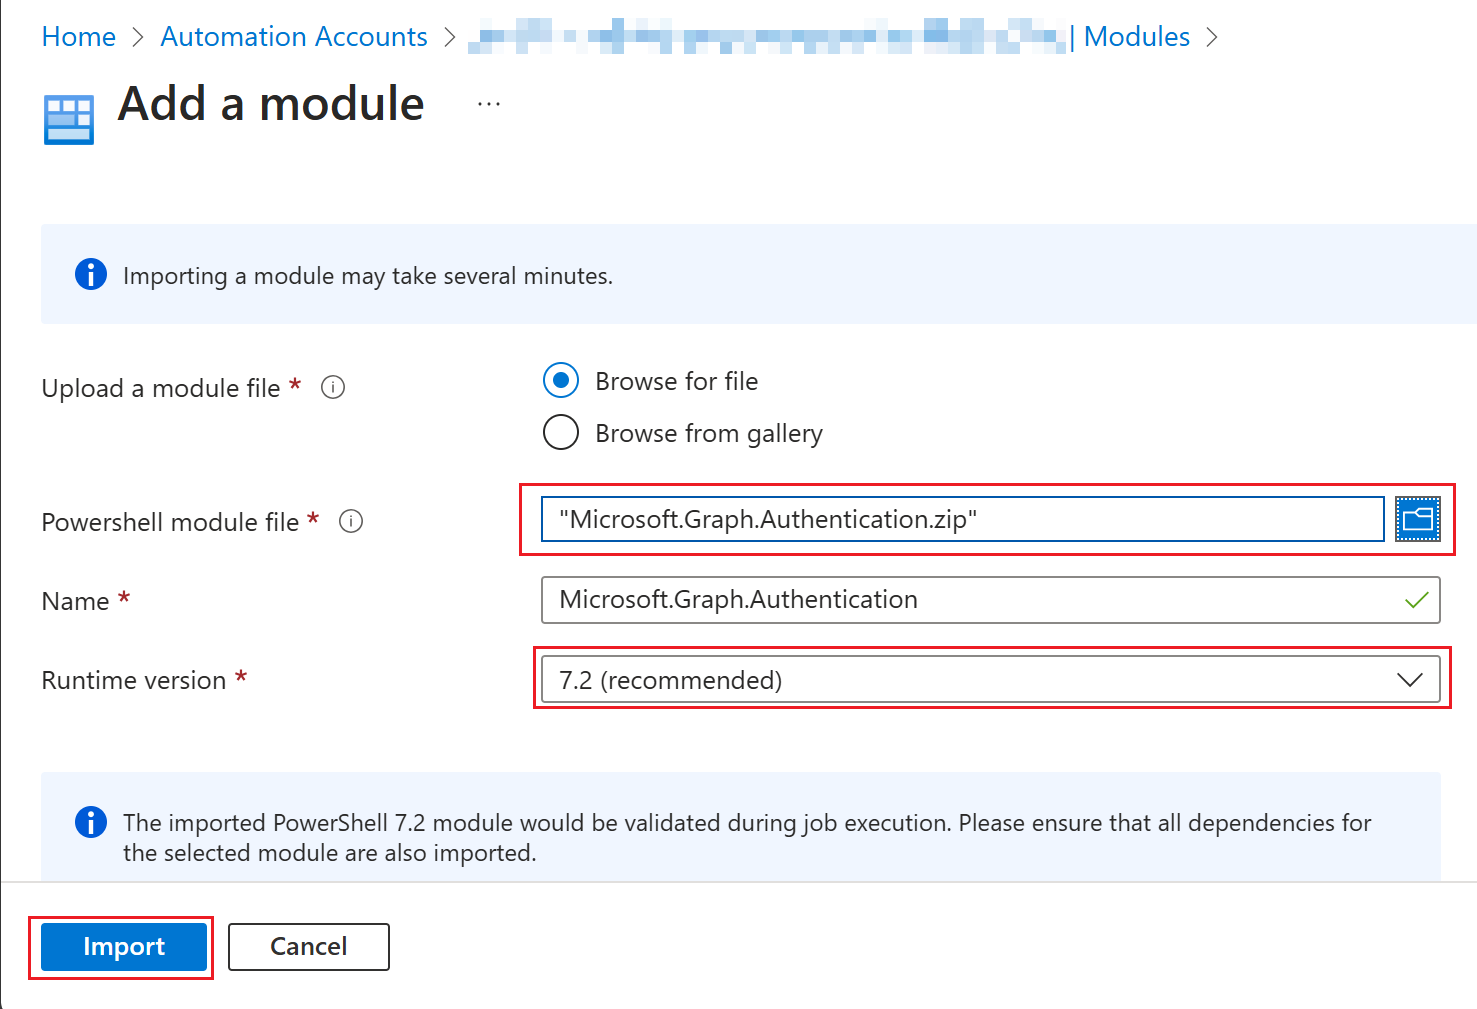
Choose "Browse for file" and select the file you have created earlier. Select a name and a runtime version (Powershell 7.2) and klick on "Import". |
|


Use System Managed Identity with Graph module
After the permissions are set you have to create a Runbook. Inside the Runbook you can develop some PowerShell code. Use the following snipped to authenticate against the Graph API using the Microsoft.Graph.Authentication PowerShell module. The Connect-MgGraph method uses the System Managed Identity with -Identity parameter. If no Client ID is specified, it will always try to use the System Managed Identity for authentication. If you want to use User Assigned Managed Identity, use -ClientID parameter.
# Connect using the Managed Identity
Connect-MgGraph -Identity -NoWelcome
# Get the current MgGraph context
Get-MgContext