Microsoft Entra ID SSO for Grafana
Prerequisites: Ability to create an app registration with delegated standard rights and access to the Grafana Docker volume. Grafana should be installed and administrator access to the web interface should be available.
These instructions describe how a Grafana Docker instance can be equipped with all the advantages of Single Sign On (SSO) using Microsoft Entra ID. Since there are different types of SSO, it is important to know that Grafana has many possibilities and offers granular, requirement-specific implementation options. For example, this means that automatic sign-up, role and user mapping, authentication scope and much more can be set.
Create App Registration
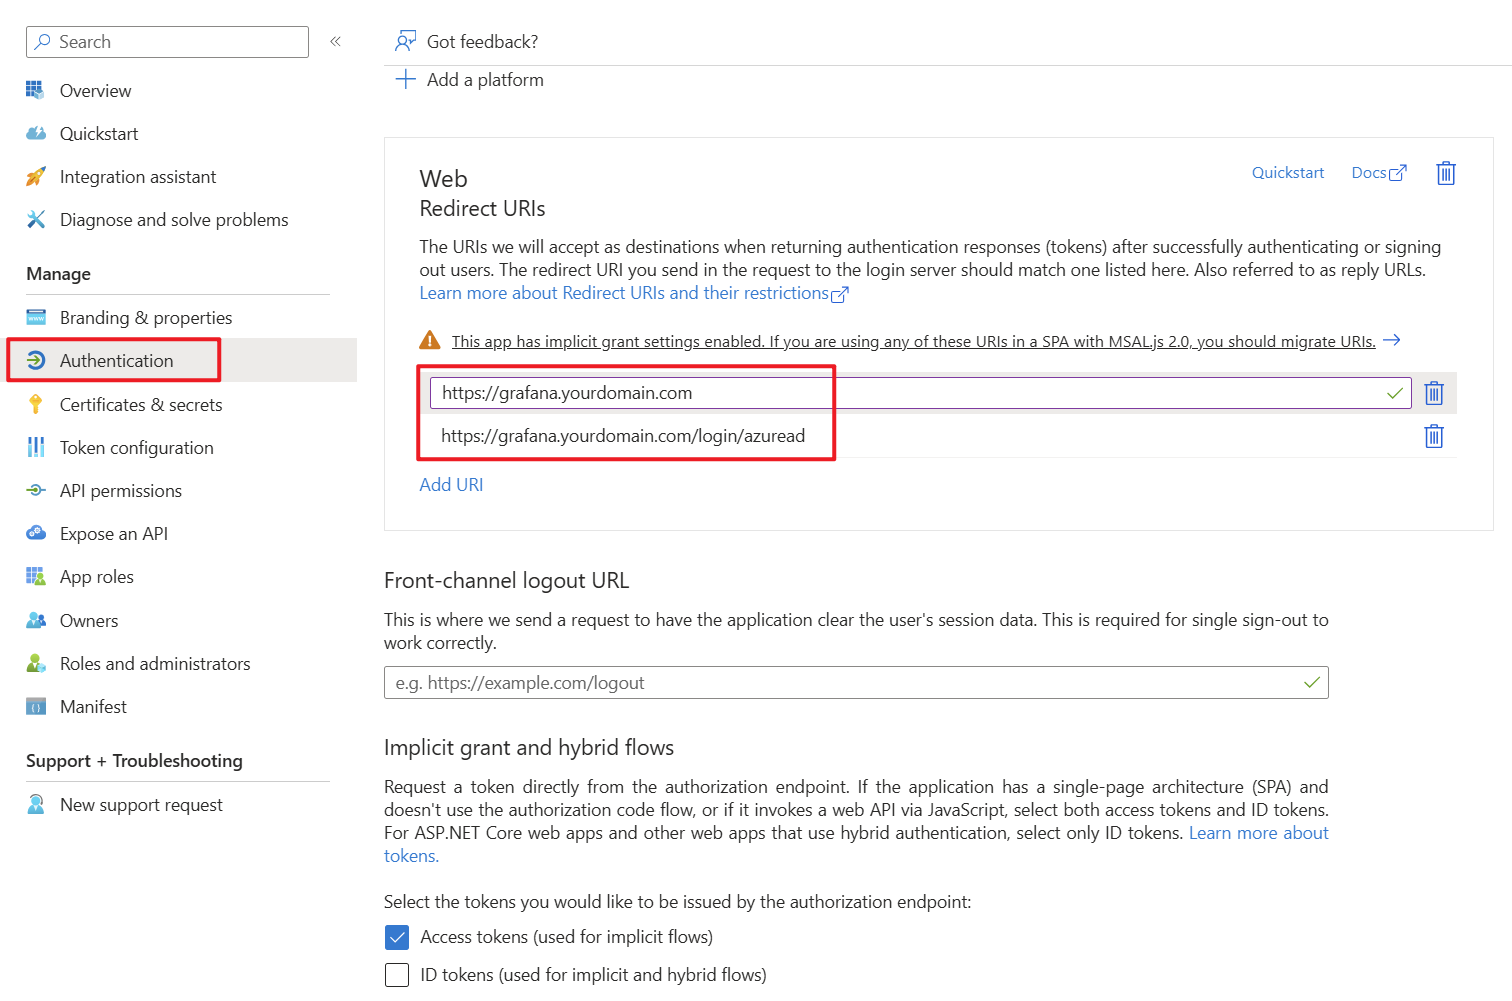
First, an app registration including client secret must be created in Microsoft Entra ID. All settings can be left at the default values. Important settings are the Redirect URIs under the Authentication tab. Set these URIs to your external or internal domain on which Grafana is available. These URIs will be used for Microsoft Entra ID to know where to redirect the user in case of successful logins.
- Authentication Type: Web
- Redirect URIs: https://grafana.yourdomain.com/ & https://grafana.yourdomain.com/login/azuread
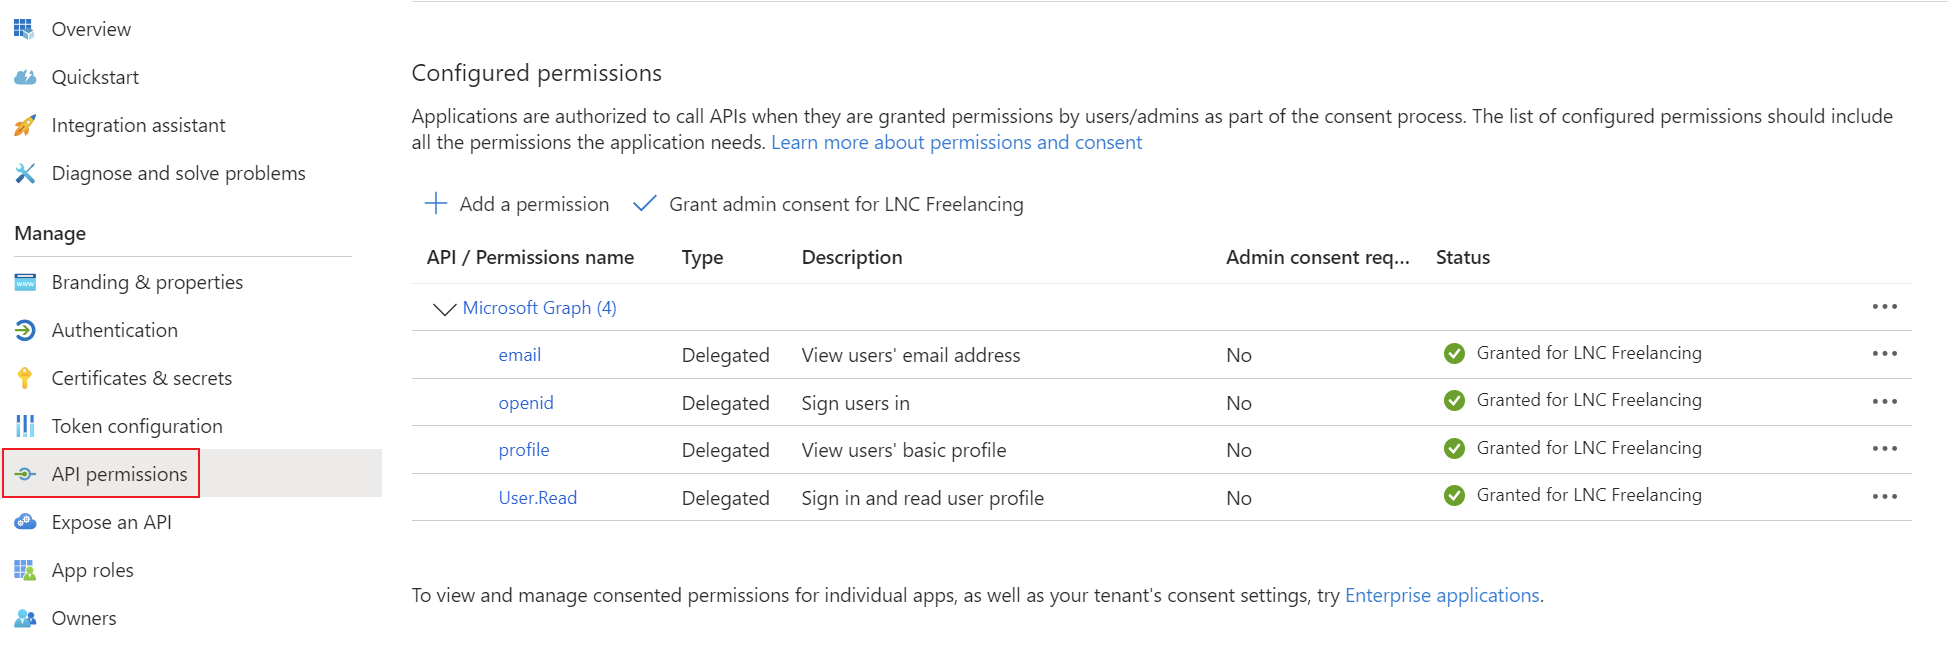
Add the corresponding permissions for OpenID Connect as delegated permissions and grant admin consent for your tenant.
- Permissions: Delegated OpenId permissions (email, offline_access, openid, profile)
Create a client secret for the application and save the tenant ID, application ID and client secret in your password manager. You can find instructions for this information here: Get app details and grant permissions to app registration
Enable authentication login provider
To equip Grafana with SSO options, the SSO API must be activated in the configuration file. To do this, the following file “/etc/grafana/grafana.ini” must be adapted. This file is normally saved in a persistent location. Create the document if it does not already exist and add the following configuration line:
[feature_toggles]
ssoSettingsApi = true
You should then restart the Docker container or the application.
Check whether configuration was successful
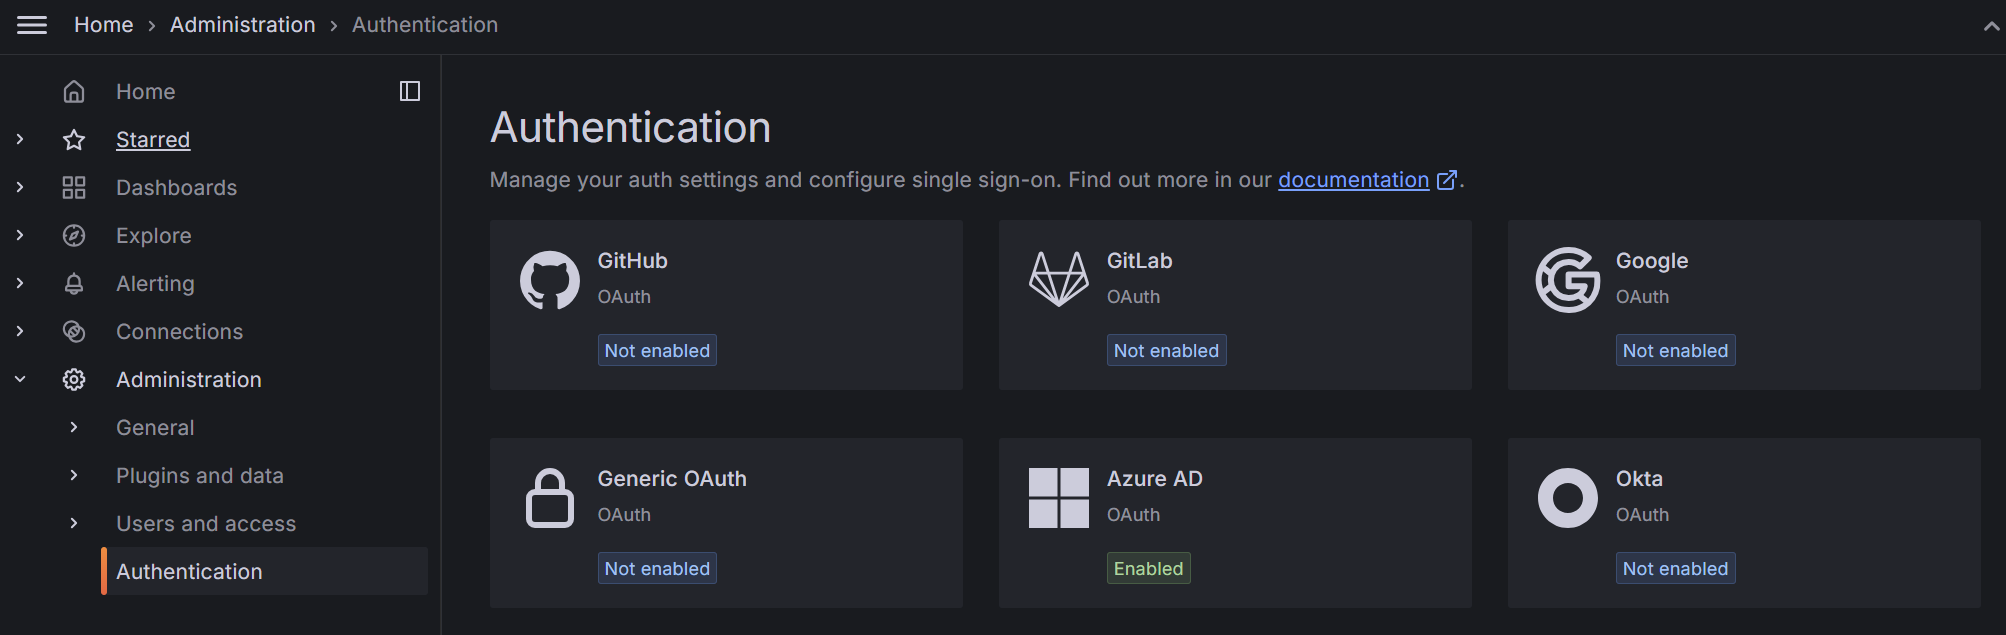
If everything is set up correctly, you can log in with the administrator account in the webgui of your Grafana installation.
You should then be able to see the OAuth providers supported by Grafana in the “Authentication” tab.
Setup Microsoft Entra ID provider
This step requires the authentication details TenantID, ClientID, Client Secret from the first step.
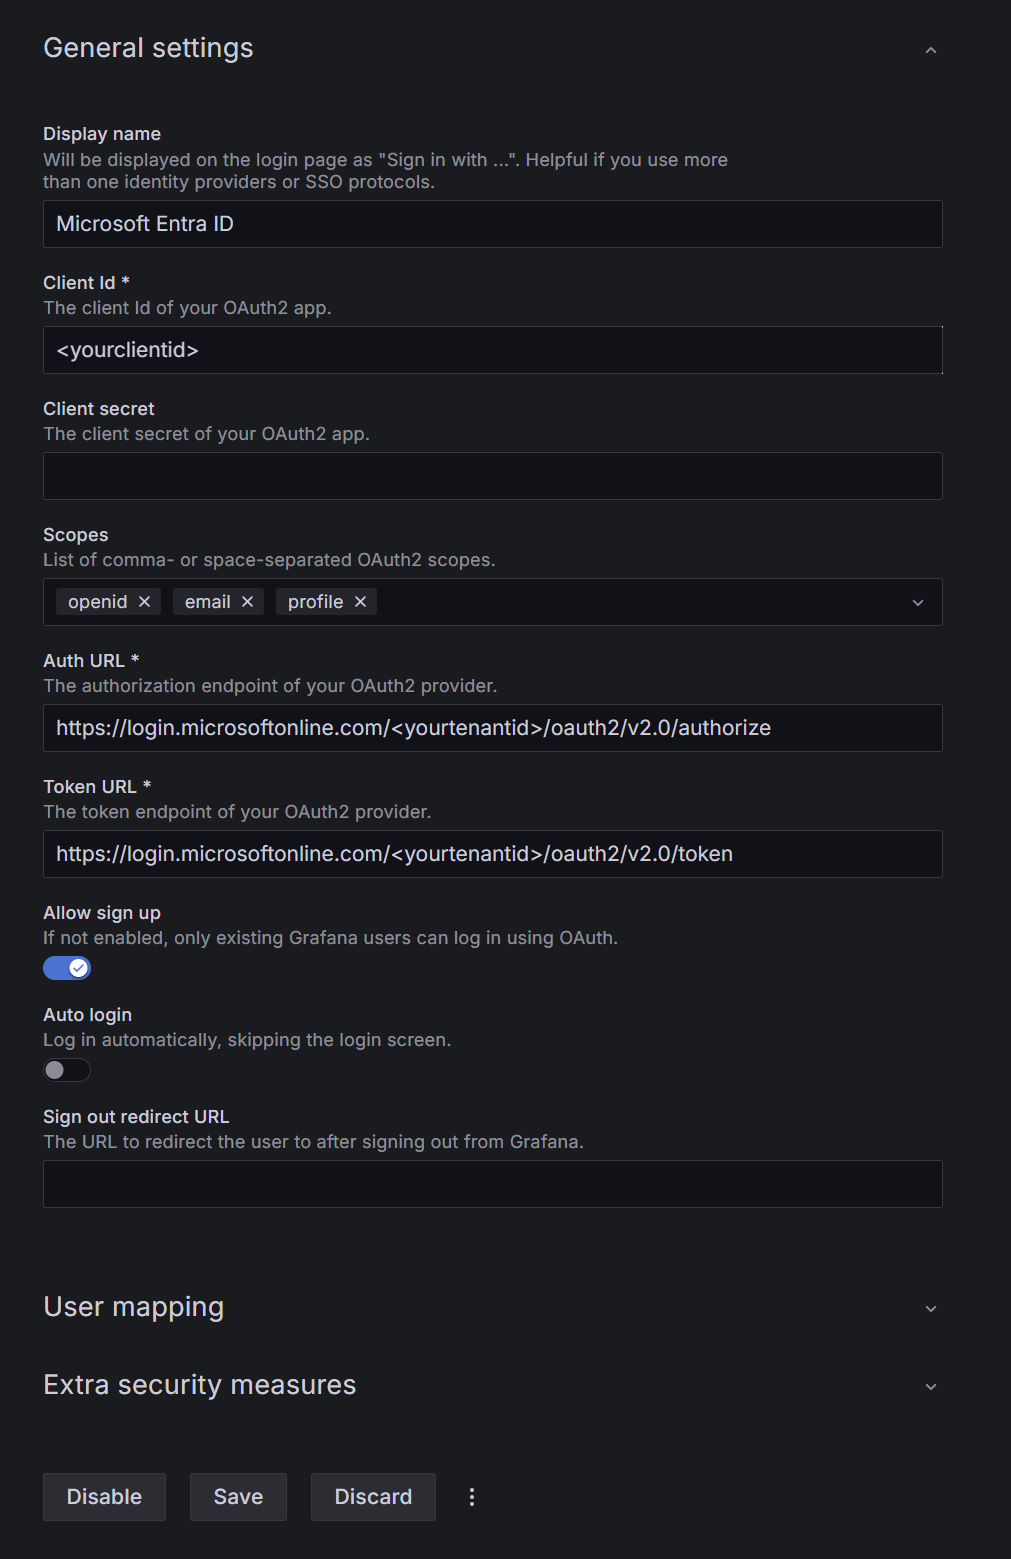
In the Grafana web interface select "Authentication" -> "Azure AD". There you can enter the credentials from Microsoft Entra ID. Enter the information as described here:
- Display Name: Enter a name that will be displayed to the end user as a button when logging in.
- Client id: Enter your ClientID from the App Registration of your Microsoft Entra ID.
- Client secret: Here you have to enter the Client Secret as passphrase.
- Scopes: This allows you to receive multiple parameters from the Microsoft Entra ID user object. The Access Token is requested with these scopes at login. The default values are usually sufficient.
- Auth URL: Enter the following URL and fill your tenant id:
https://login.microsoftonline.com/<yourtenantid>/oauth2/v2.0/authorize - Token URL: Enter the following URL and fill your tenant id:
https://login.microsoftonline.com/<yourtenantid>/oauth2/v2.0/token - Allow sign up: If this is enabled all user who have permission to sign in to your App Registration, are automatically signed up as user objects in Grafana. As you can still manage permissions within the App Registration this is usually recommended.
- Auto login: This logs your users automatically into Grafana if they have an Access Token for Microsoft Entra ID.
After these settings are properly configured your users should be able to sign into Grafana. For more granular settings and things like role mapping or default Grafana groups, change the settings under "User mapping" and "Extra security measures".